 Sign in to Mod The Sims
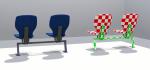
 Sport Bench (TSPS Conversion)
 Sport Bench (TSPS Conversion)
MTS has all free content, all the time. Donate to help keep it running.
SCREENSHOTS


Main.jpg - width=905 height=905
Back.jpg - width=1459 height=680
Front.jpg - width=1869 height=916
Description.jpg - width=550 height=254
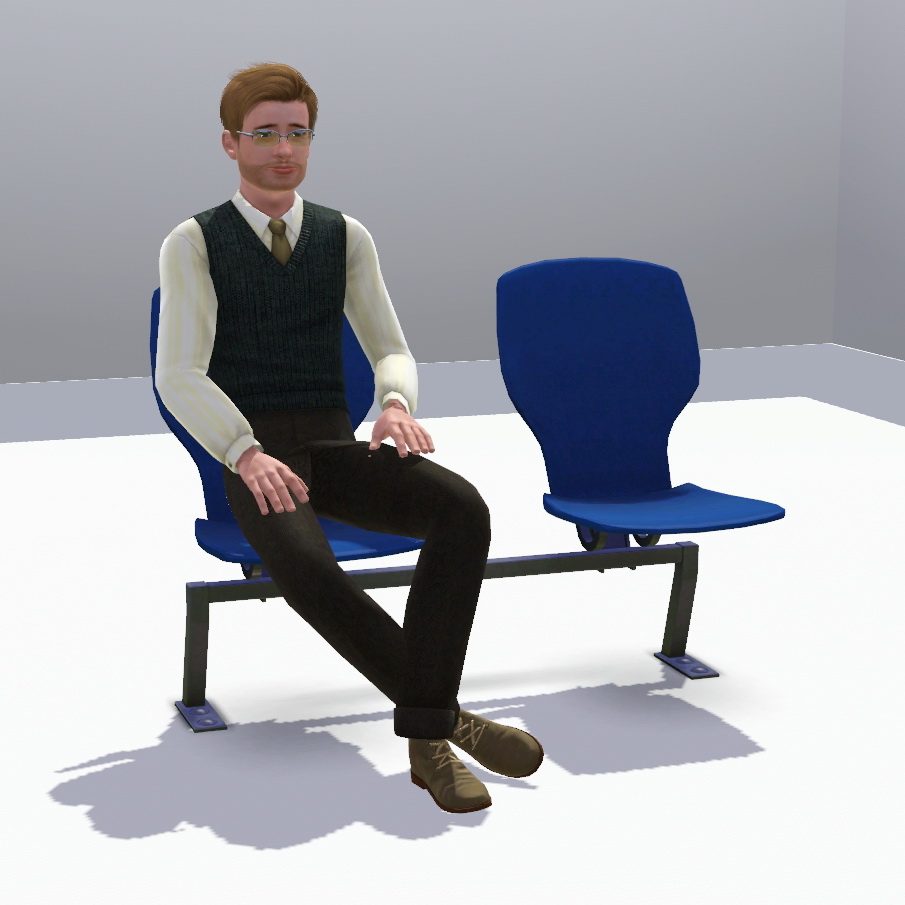
Hi everyone! I've been a Sims fan since I was a child, although I have not been very active in the online community. However, I thought that it was time to start giving something back after years of enjoying the amazing creations of other fans. This is the first in a, hopefully, series of conversions of Sims 2 and Sims Stories objects. It's the sport bench from The Sims Pet Stories! I think this is an object most of you will find very useful, especially in community lots.
The Process:
Creating good conversions is not an easy process; you can't just copy-paste an object from a game to another. For this object I had to create the ground shadow from scratch, bake the multiplier textures, and fix the container entries and more. But I'm quite happy with the result. It's not perfect but I did my best to make it look as good as I could. Bear in mind that, as with other TS2/Stories objects it has a high number of polygons so it might impact on game performance in lower-end machines.
Catalog Location:
Sort by Room -> Outdoors -> Outdoor Seating
Sort by Function -> Comfort -> Miscellaneous Comfort
Presets and Channels:
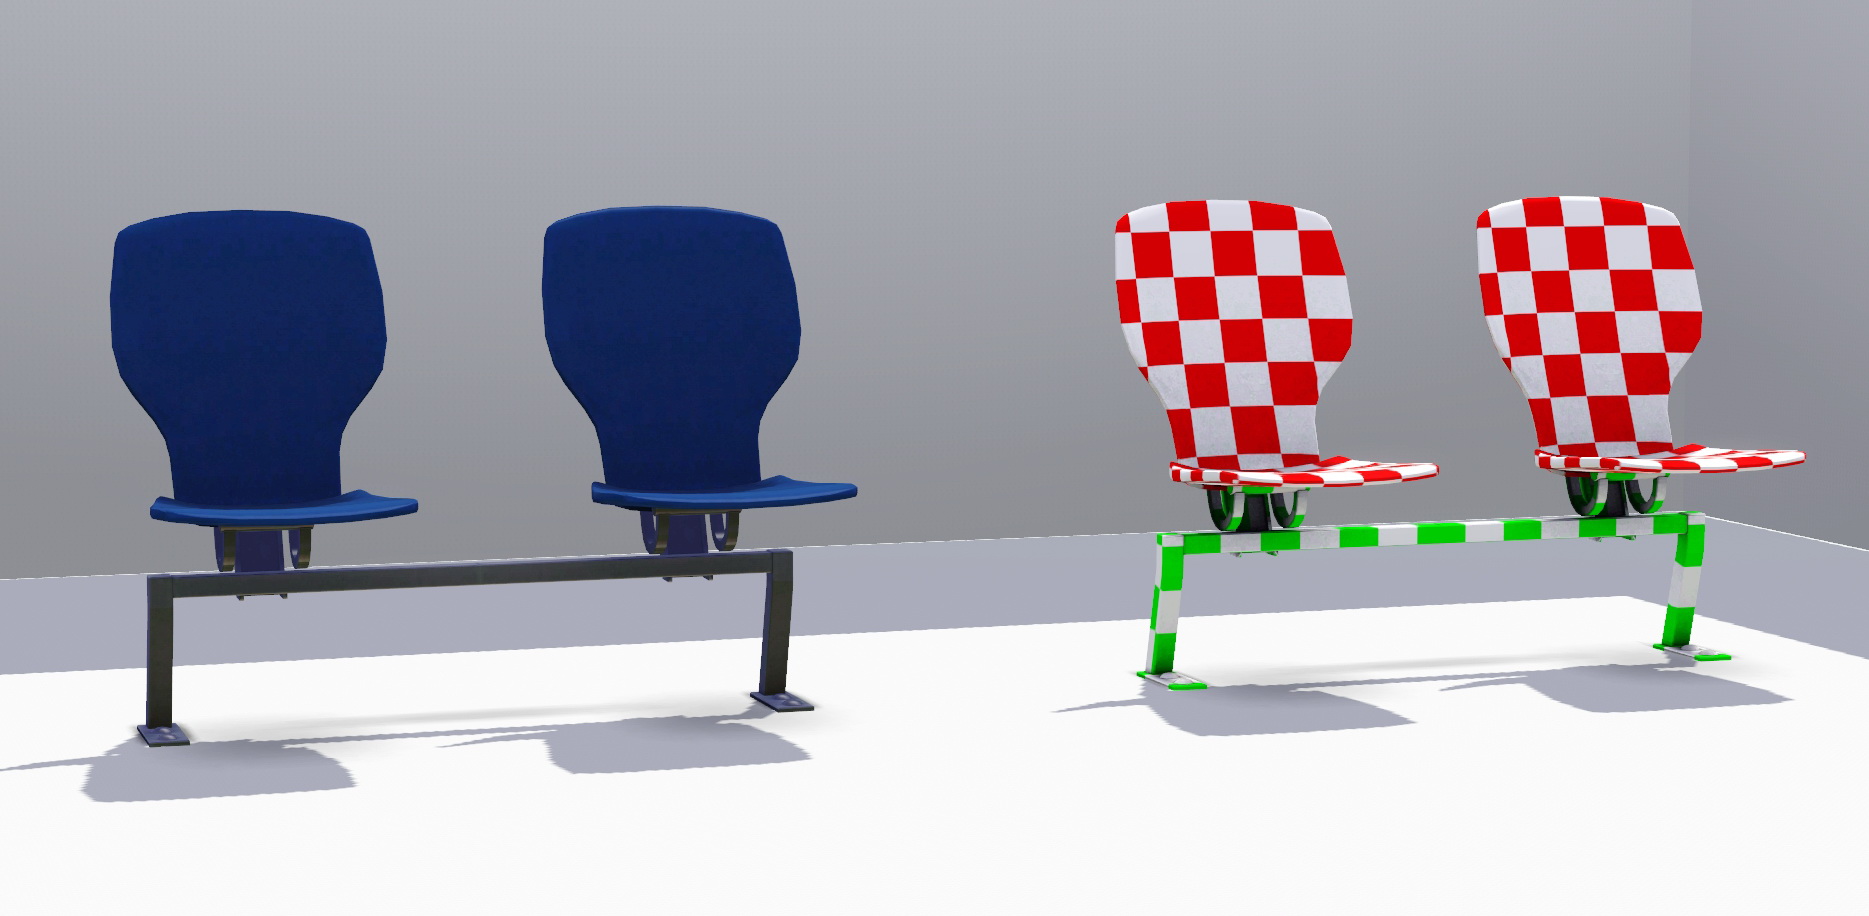
It includes all the preset colors (blue, black, purple, red, green, orange and yellow) and two channels for you to CAST whatever you want. It is a cloned from a base game object, so it should work for everyone.
FRONT:
BACK:
Polygon Counts:
High Detail Mesh -> 2788
Low Detail Mesh -> 906
Additional Credits:
- TSR Workshop
- Milkshape 3D
- Photoshop
- Blender
- Maxis/EA for the original mesh and UV mapping.
The Process:
Creating good conversions is not an easy process; you can't just copy-paste an object from a game to another. For this object I had to create the ground shadow from scratch, bake the multiplier textures, and fix the container entries and more. But I'm quite happy with the result. It's not perfect but I did my best to make it look as good as I could. Bear in mind that, as with other TS2/Stories objects it has a high number of polygons so it might impact on game performance in lower-end machines.
Catalog Location:
Sort by Room -> Outdoors -> Outdoor Seating
Sort by Function -> Comfort -> Miscellaneous Comfort
Presets and Channels:
It includes all the preset colors (blue, black, purple, red, green, orange and yellow) and two channels for you to CAST whatever you want. It is a cloned from a base game object, so it should work for everyone.
FRONT:

BACK:

Polygon Counts:
High Detail Mesh -> 2788
Low Detail Mesh -> 906
Additional Credits:
- TSR Workshop
- Milkshape 3D
- Photoshop
- Blender
- Maxis/EA for the original mesh and UV mapping.
This is a new mesh, and means that it's a brand new self contained object that usually does not require a specific Pack (although this is possible depending on the type). It may have Recolours hosted on MTS - check below for more information.
| Filename | Size | Downloads | Date | |||||
|
TSPS-SportBench.rar
Size: 263.7 KB · Downloads: 4,369 · 11th Jan 2014 |
263.7 KB | 4,369 | 11th Jan 2014 | |||||
| For a detailed look at individual files, see the Information tab. | ||||||||
Key:
- - File was updated after upload was posted
Install Instructions
Quick Guide:
1. Click the file listed on the Files tab to download the file to your computer.
2. Extract the zip, rar, or 7z file. Now you will have either a .package or a .sims3pack file.
For Package files:
1. Cut and paste the file into your Documents\Electronic Arts\The Sims 3\Mods\Packages folder. If you do not already have this folder, you should read the full guide to Package files first: Sims 3:Installing Package Fileswiki, so you can make sure your game is fully patched and you have the correct Resource.cfg file.
2. Run the game, and find your content where the creator said it would be (build mode, buy mode, Create-a-Sim, etc.).
For Sims3Pack files:
1. Cut and paste it into your Documents\Electronic Arts\The Sims 3\Downloads folder. If you do not have this folder yet, it is recommended that you open the game and then close it again so that this folder will be automatically created. Then you can place the .sims3pack into your Downloads folder.
2. Load the game's Launcher, and click on the Downloads tab. Find the item in the list and tick the box beside it. Then press the Install button below the list.
3. Wait for the installer to load, and it will install the content to the game. You will get a message letting you know when it's done.
4. Run the game, and find your content where the creator said it would be (build mode, buy mode, Create-a-Sim, etc.).
Extracting from RAR, ZIP, or 7z: You will need a special program for this. For Windows, we recommend 7-Zip and for Mac OSX, we recommend Keka. Both are free and safe to use.
Need more help?
If you need more info, see:
- For package files: Sims 3:Installing Package Fileswiki
- For Sims3pack files: Game Help:Installing TS3 Packswiki
Also Thanked - Users who thanked this download also thanked:
Packs Needed
None, this is Sims 3 base game compatible!
Other Information
Style:
– Contemporary
Room:
– Outdoor
Maxis Flags:
– Not Applicable
Tags
#TSPS, #conversion, #ts2, #bench, #sport
More Downloads BETA
Here are some more of my downloads: