View Single Post in: Using SimRipper meshes and textures in Blender - for Dummies
#3
 31st Mar 2020 at 3:41 PM
31st Mar 2020 at 3:41 PM
1. With your imported mesh selected, click the sphere (Materials) icon under the Scene listing. Click the + next to 'New' to add a material.
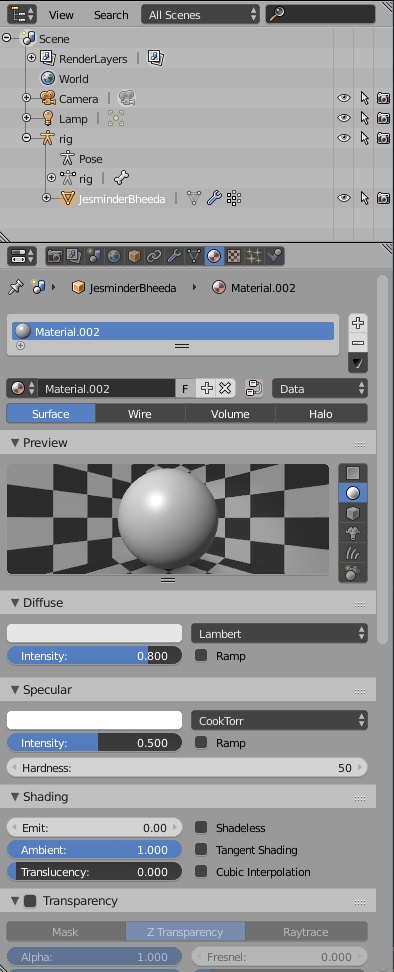
2. Now click the checkerboard (Texture) icon next to the sphere/materials icon. Again, click the + next to 'New' to add a texture.

3. In the settings for the new texture:
- Type should be 'Image or Movie'.
- Under 'Image', click the 'Open' button and select your diffuse texture exported from SimRipper.
- Under 'Mapping', make sure Coordinates are set to 'UV' and right underneath click on the blank next to Map: and select the map ending in -mesh-map-0.
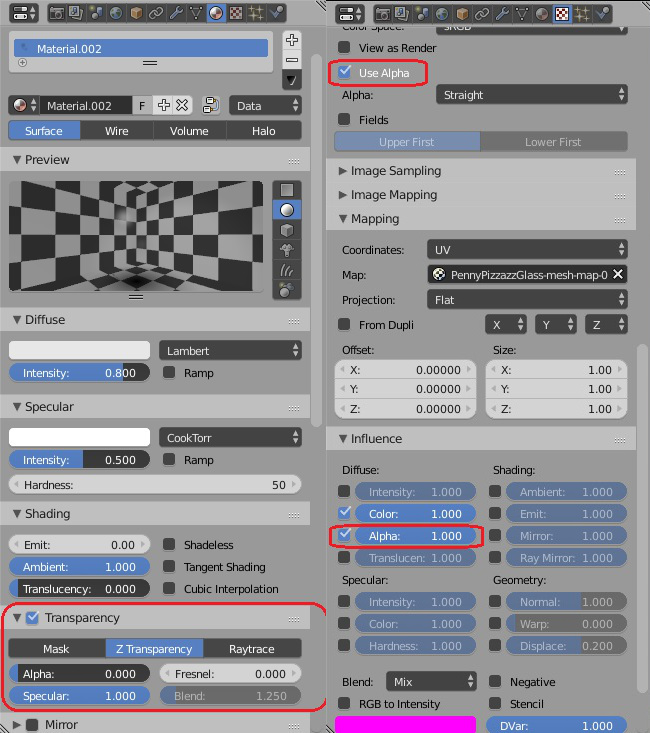
4. If you have a 'glass' mesh, or alpha hair (uses transparency) or any additional mesh that requires transparency:
- First go back to the Materials panel by clicking the sphere/Materials icon. (If you don't Blender may get confused and you could have a completely empty Texture panel.)
- Select the 'glass' or transparency mesh.
- Add a new material as above.
- Click the Texture icon and add a new texture as above.
- Select and open the diffuse 'glass', 'hair', or whatever texture image and set the mapping as above.
- In the Image section make sure Use Alpha is checked.
- Scroll down to the Influence section and check the box next to 'Alpha: 1.000' under Diffuse.
- Go back to the Materials panel, find the Transparency section, check the box next to 'Transparency', and change the number for Alpha to 0.
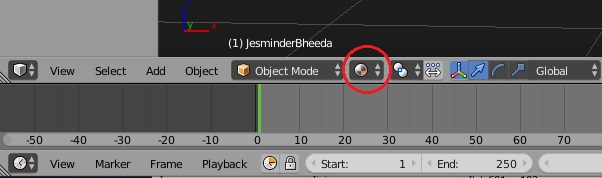
5. Now look in the lower left of the Blender screen. If you click where it says "Object Mode" and change it to "Texture Paint", you should see your sim fully textured. However, this only works for the selected mesh and will not show transparency correctly.

6. In order to use animations and transparent parts, you'll have to go back to Object Mode, click on the icon next to the mode selection and select Material. The texture will be applied but the window will be very dark. See the lighting section later on for how to fix that.
Notes: If you have a sim with alpha transparency 'glass' hair, the hair mesh (and any other transparency parts) will be in a separate mesh. In this case, you have to import and apply the 'glass' texture exported from SimRipper to the 'glass' mesh as explained above.
Please do not PM me with mod, tutorial, or general modding questions or problems; post them in the thread for the mod or tutorial or post them in the appropriate forum.
Visit my blogs for other Sims content:
Online Sims - general mods for Sims 3
Offline Sims - adult mods for Sims 3 and Sims 4