 Sign in to Mod The Sims
- Site Map >
- Modding and Creation >
- Sims 3 Creation >
- Tutorials >
- Object Creation - Tutorial: How To Make A Simple Texture Replacement
- Site Map >
- Modding and Creation >
- Sims 3 Creation >
- Tutorials >
- Object Creation - Tutorial: How To Make A Simple Texture Replacement
#1
 11th Jun 2009 at 1:33 AM
Last edited by HugeLunatic : 21st Feb 2010 at 1:39 PM.
Reason: Updating tool links
11th Jun 2009 at 1:33 AM
Last edited by HugeLunatic : 21st Feb 2010 at 1:39 PM.
Reason: Updating tool links
11th Jun 2009 at 1:33 AM
Last edited by HugeLunatic : 21st Feb 2010 at 1:39 PM.
Reason: Updating tool links
Please Note: The tutorial uses an outdated too so the images are different, the process however is still quite similar.
What you will need...
Helpful But Not Required...
What This Tutorial Will Do
Teach you how to make your own texture replacements for Sims 3.
What This Tutorial Will Not Do
Make new textures for the Sims 3.
Teach you how to use your paint program. I'll be explaining the steps I used only. If you know a better way feel free to let me know about it since I'm not familar with GIMP which is why I use Paint Shop Pro for everything I can.
Step 1
Open Project S3PI and check the following boxes, enable filter, auto hex, sort, resource type, display resource names.
Step 2
Since I already know that the textures for most objects are stored in .DDS files I'll go into the file type list and look up the resource number for DDS. Which is 0x00b2d882 so paste that in the resource type box.
Step 3
I also know that most of the DDS files for the game objects are stored in the FullBuild2.package located in Electronic Arts\The Sims 3\GameData\Shared\Packages folder. This is located in program files or whereever you installed your game to.
Step 4
Click the name column to sort the DDS files by the resource name. This will make finding what you're looking for a bit easier. It should be noted at the moment I have not found a way to make this work on clothing so if you intend to use this tutorial for clothing don't because all my efforts have failed in doing simple texture replacements on clothing.
Step 5
Search the list for the DDS you wish to replace. Some items will be harder to find than others due to EA's illogical naming sometimes. Luckily, I found the protest signs rather easily. They're called signsPicket.
Step 6
Now that you've found the DDS you wish to edit click on it and under file choose export. For file type choose all files and at the end of the long file name add .dds and save.
Step 7
Now that we've exported our DDS to for working with we need to open up GIMP. Then open our DDS file and you should get a message. Uncheck load mipmaps and hit okay.
Step 8
I've decided to replace this computer sign with a bit of God worship. I've already got my replacement made up in Paint Shop Pro since I find it easier to use. You can do yours in GIMP or whatever program you like.
Step 9
What you want to do is paste your new image as a new layer. If you image is bigger than the sign image scale it down to fit. I use the little red box as a guideline for where my image should be on the sign. This is why I didn't paint the background white first. So scale, move, stretch and skew your sign whatever you need to do to get it where you want it in the box. Here's my sign after that was done.
Step 10
After you have the sign positioned where you want it paint the background white except for the little piece on the side which is the sign post.
Step 11
Now this is probably the most important step of the whole painting process. Switch to you second layer and merge it with the bottom layer. I forgot to do this the first time and got the result of a plain white sign. Luckily, I still had GIMP open and could easily correct it.
Step 12
From the file menu choose save as... You'll get a message about the file already existing and be ask if you want to overwrite it. Choose yes or okay whatever it says that isn't no. Save with the following settings compression: DXT5 or DXT1 depending on the file. You can find the compression the original uses by looking at the DDS in a hex editor or by clicking the auto hex box in Project S3PI when extracting. format: default and check generate mipmaps.
Step 13
Open Project S3PI if you had closed it earlier. If not just switch to it. Choose new from the file menu. Then choose import and select your altered DDS. You do not need to change the settings on import since the default ones are fine.
Step 14
Save you package to you mods/packages folder which you should create using the steps described HERE. Test in game and go forth and protest.
Special note for machinima artists:
In order for your Sim to protest only one thing you will have to replace all the signProtest signs using the steps described. You only have to make 1 texture though since the DDS can be saved over all the other signs and imported into the same package.
Notes:
- The sign shown at the end is different from the tutorial sign because it was my proof of concept sign. By the time I wrote the tutorial the protest was over and I could no longer replace it for a picture of the tutorial sign. The anti EA sign was made for people who are frustrated with their buggy games and can be found along with other protest signs at my own forums.
- I am aware of the mislabeling of some of the step numbers in the pdf version of the tutorial. They're in order so it's not a problem that there's 2 step 11's. It'll be corrected when I update the tutorial should new information become available.
- The pictures are larger in the pdf if you have trouble seeing some of the information in the pictures I suggest the pdf. Actually, I recommend the pdf for the most part since in my experience MTS is usually down for maintence whenever I need a tutorial. It's much less frustrating to have it handy.
- Some game textures just are stubborn and will not submit to this method. So this tutorial will work for some things but not for others. Hopefully, you find this information useful and it works for what you want to do. I've found paintings to be a bit problematic since my attempts at replacing the picture have all resulted in failure.
- I am subscribed to this tutorial even if I don't visit here every day. If I don't answer you in a reasonable amount of time feel free to pm me. I have problems with subscriptions and notifications not coming thru at times so I'll try to stop by at least once or twice a week to make sure I'm not missing them.
- When all else fails. Hit it with a hammer.
Ammendment
While custom paintings may not be possible via game option or the classic trick of pausing the game before they start painting still life and replace it with your own texture, you can however replace the paintings they do paint using the methods above.
The paintings are named 1_1_small, 1_2_Small, etc. and for the most part appear in the beginning of Fullbuild2.package. The only exception I've found so far is the masterpiece paintings which are named Masterpiece_1_Large, Masterpiece_2_Large, etc.
Now there's a bunch of paintings for each painting due to the traits painting different paintings. So there's usually around 10 files you need to replace. I've found the easiest way to test paintings is to start painting in game and then go find the painting that matches up with what you're painting in game and replace it. That way any changes to it are shown immediately so you can see that it's working.
For the different painting types via traits I recommend using a program that has filters and scripts that can be applied to the original painting. Don't worry about trying to match up with EA's idea of what each trait should look like because I've found they don't have a good grasp on insanity which I find rather shocking. Just try to make each painting interesting and unique. Try mixing and matching filters and see what you come up with.
The number 1_1, 1_2, etc. is the skill level Sims can start painting that painting at. So if you knew the skill level of your Sim and the size of the painting it makes tracking it down a bit easier since you don't have to look thru 1500 pictures to find the one you want.
Once you've got all your textures. Package them up. Put them in the mods/packages folder, grab your paintbrush and paint away.
I replaced this kitten painting with Vigo The Carpathian.
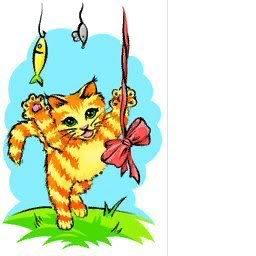
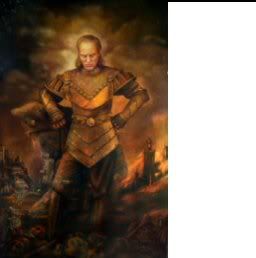
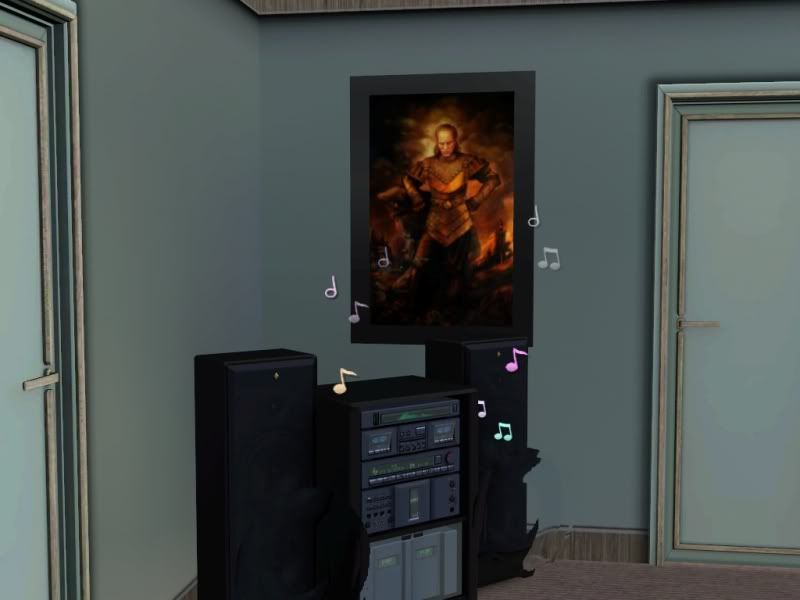
Doesn't Vigo look happy now that he no longer suffers from Carpathian kitten loss?
9 users say thanks for this.
(Who?)
Thanks
Advertisement
#2
11th Jun 2009 at 3:33 AM
11th Jun 2009 at 3:33 AM
Posts: 186
Thanks: 3150 in 10 Posts
Yayyy! Thanks sooo much! :D
Whee.
Whee.
#3
11th Jun 2009 at 4:41 AM
11th Jun 2009 at 4:41 AM
Posts: 21
Thanks: 677 in 2 Posts
cool!!thanks for making this tutorial! :lovestruc
#4
11th Jun 2009 at 9:17 AM
11th Jun 2009 at 9:17 AM
Posts: 6
Nice tutorial, but if we fail do we really have to do DIY in our underpants?
#5
11th Jun 2009 at 1:57 PM
11th Jun 2009 at 1:57 PM
Quote: Originally posted by Elando
| Nice tutorial, but if we fail do we really have to do DIY in our underpants? |
No. Underpants are optional.
#6
12th Jun 2009 at 9:02 AM
12th Jun 2009 at 9:02 AM
Posts: 23
Thanks: 74 in 3 Posts
Quote: Originally posted by ThomasRiordan
| No. Underpants are optional. |
so in the nude or in your underpants... :S hehe
Thanks for the tutorial, was trying to get my head around the package files last night, so this will be a great help tonight, thanks once again :D
Discombobulation is the aim of the game....?!?
.....I'll get my coat ;(
#7
13th Jun 2009 at 3:55 PM
13th Jun 2009 at 3:55 PM
Posts: 33
Thanks: 1636 in 31 Posts
Quote: Originally posted by ThomasRiordan
| I've found paintings to be a bit problematic since my attempts at replacing the picture have all resulted in failure. |
First and foremost thanks for the tutorial, really helpful. As for the issue you mentioned there, may it be that you checked already placed paintings without deleting the cache files when you tested 'em in game? I just replaced all the game paintings with new pics today (and uploaded the little mod now waiting in the mod queue), and had almost no issues at all. Apart, as said, that without "cleaning the cache" the new pics do work only on newly bought paintings.
Some strange quirks are left for few specific paintings, where sometimes the new pic works for all but 1 or 2 frame styles, with which the old, vanilla pic comes back to life. Something that really makes no sense, but oh well :P
I don't know half of you half as well as I should like; and I like less than half of you half as well as you deserve.
#8
13th Jun 2009 at 4:24 PM
13th Jun 2009 at 4:24 PM
Actually, that could exactly be it. I need to remember those cache files. I'll try again.
Test Subject
#9
15th Jun 2009 at 12:08 PM
15th Jun 2009 at 12:08 PM
Posts: 9
I didn't even know you could protest. We need a mod so we can start protests ourselves. Anyway thanks for the help, this will help me alot.
#10
15th Jun 2009 at 4:45 PM
15th Jun 2009 at 4:45 PM
Yeah, I'm not sure what causes protests. I haven't been able to start one but I've had weeks where there were protests everyday and then I've gone days without them too. I passed one last night on the way to my pool party and my friend was leading a revolt against Activision/Blizzard which is funny since he is angry with them over their treatment of the Ghostbusters game. Needless to say he showed up at the party late because he had other things to be doing.
Test Subject
#11
16th Jun 2009 at 9:52 PM
16th Jun 2009 at 9:52 PM
Posts: 2
nice tutorial...would this also work for clothes ??? or would I need a different one if I were to say put in a custom design for a jacket un ?
#12
16th Jun 2009 at 10:04 PM
16th Jun 2009 at 10:04 PM
It works for clothing somewhat but not entirely. You'd have to poke around a bit to get it to override just one piece of clothing if it's even possible. From the little attempts I've made at using this on clothing it overrode the entire piece of clothing so if I changed one set of underwear all underwear using that mesh got replaced with my new texture. You can override the logos for clothing though since the way EA did it was actually cleaver. The logo and the shirt is two separate textures which is why the shirt can be recolored without messing up the logo. Snaitf has made some progress in getting the game to accept new logos and clothing so you might want to have a look here to see how he does it. Delphy is also working on a tool that should make it a bit easier to do it too once it's released to the public.
Test Subject
#13
17th Jun 2009 at 6:42 AM
17th Jun 2009 at 6:42 AM
Posts: 2
I'll wait for delphy's probably...because I'm kinda planning on adding a logo onto a shirt that really doesn't have one...on both the front and the back. and make it look like it's a part of the clothes.
#14
19th Jun 2009 at 1:35 PM
19th Jun 2009 at 1:35 PM
For those who were interest and might have missed it Delphy's Clothing Tool from making logos is now available.
I've also amended the tutorial here to include information about creating custom paintings.
I've also amended the tutorial here to include information about creating custom paintings.
#15
19th Jun 2009 at 6:54 PM
19th Jun 2009 at 6:54 PM
Posts: 33
Thanks: 1636 in 31 Posts
Quote: Originally posted by ThomasRiordan
| I've also amended the tutorial here to include information about creating custom paintings. |
Man, you really are God, Thomas

I was messing with the actual "exceptions", and because of that I didn't even notice the variants were dependant on traits. This is gonna help me a lot to sort out and put up a serious themed set of paintings.
About that, there's also "Brilliant" together with "Masterpiece". I assume - no gametested proof though - that brilliant is triggered by a skill level of 10 and masterpiece when you have the lifetime happiness reward related to paintings (dunno how it's called in english, the one at 30.000 points). Or maybe viceversa.
Just a question about something you might already have noticed while testing (if not I'll just investigate it myself ^^):
Do the game pick at random one of the possible paintings related to your traits, or are there traits that tend to get some sort of priority?
As in, let's say a sim is at skill level 0, he is genius and evil, and paints a medium canvas: the painting will be chosen between the 9 total possible variants for that skill level and size (3xevil, 3xgenius, 3xbasic/notraits), only 6 derived from traits (3xevil and 3xgenius, taking out the 3 basic chances) or even between traits some can have the priority, and as such in this example only evil OR genius paintings would be used?
I don't know half of you half as well as I should like; and I like less than half of you half as well as you deserve.
#16
19th Jun 2009 at 7:18 PM
19th Jun 2009 at 7:18 PM
It seems to be random. My Sim painted the normal painting of Vigo despite having other traits like computer whiz and artistic. While with my proof concept painting that I made of my bird he painted the more artistic version of the painting. I didn't really get into what makes them paint a particular painting just that the paintings were replaceable. It's a shame they didn't put in the custom painting option though because they really put in some nice paintings this time around. It's obvious that they can apply filters to an image on the fly since you can paint insane paintings of things you take pictures of in the game. Which probably would have been a better method of doing these too since it would greatly reduce the amount of images needed per painting. So instead of 30-40 different paintings they could have spent time adding more of them and just allow the game engine to apply the filter based on traits. I'm sure the custom painting option will come in an expansion pack. Hopefully, the first one since that was the feature in Pets I used the most. I'm surprised they left it out considering how they said they wanted this to be the most customizable game yet and did so much to improve the other skills to make earning them actually do something other than just make sure you don't get electrocuted repairing the TV.
P.S. I'm not really a God. I just play one in real life.
P.S. I'm not really a God. I just play one in real life.

#17
23rd Jun 2009 at 10:42 PM
23rd Jun 2009 at 10:42 PM
Just as a note, this can also be used to do skintone replacements. You need the following textures/instances:
AFface (af only)
Light: 0x40e5744b0dbfc323
Dark: 0x304910be2cb17463
YFface (yf/tf)
Light: 0x66f8047c00c00cbb
Dark: 0x366fb0326a0319ab
EFface (ef only)
Light: 0x503c527e546e8c5
Dark: 0x629e533c0262e927
AFbody (af/yf/tf/ef)
Light: 0xb4cdc208d8d51bf0
Dark: 0x185d7126c73dc404
AMface (am only)
Light: 0x6f853f0e35157e24
Dark: 0x6ca41c919ece1be0
YMface (ym/tm)
Light: 0x598325880b644f6c
Dark: 0x59a633f6fb9d4a58
EMface (em only)
Light: 0x7edd5d417bc66680
Dark: 0x21f6bac9b048b934
AMbody (am/ym/tm/em)
Light: 0x4db46d1662895fc3
Dark: 0xb1d30a51a5ed1903
I've attached the original files to this post. I've also included the specular (filenames have _s in them) which affects the shine applied to the skins (whiter = shinier) and the overlays (_o in the filenames) which are used for teeth, tongue, and the overlay of the lip textures. And there are the child, toddler, and baby skins (regular, dark, overlay, and specular) that I could find.
I haven't verified if any of these are shared between ages, but you can get the instance number from the filename - it's the first block of numbers. For example:
puFace_m_0xf27771adae43381f_0x00B2D882-0x00000000-0xF27771ADAE43381F.dds
The instance is 0xf27771adae43381f (same as the last block).
Types should all be 0x00b2d882 and group is always 0x00000000
If you edit the skins, you need to do both a light and dark version of every texture you want to change. Easiest way to make a matching dark version is to copy the default dark version, paste it as a layer overtop your edited skin, and set the layer blend type to Color.
I'm also attaching the original eye textures. I haven't edited these myself but these are the files Aikea edited and got replaced so I'm assuming an edit will work just fine. Again, get the instances to replace from the filename.
These are multi-part RARs (the skins anyway) so extract the first one with 'em all in the same place and the rest will follow.
Use DXT1, DXT3, or DXT5 for the DDS type when saving your edits. Don't use 8.8.8.8 ARGB as it's completely uncompressed and you'll end up with umptyjillion MB textures.
my simblr (sometimes nsfw)
“Dude, suckin’ at something is the first step to being sorta good at something.”
Panquecas, panquecas e mais panquecas.
AFface (af only)
Light: 0x40e5744b0dbfc323
Dark: 0x304910be2cb17463
YFface (yf/tf)
Light: 0x66f8047c00c00cbb
Dark: 0x366fb0326a0319ab
EFface (ef only)
Light: 0x503c527e546e8c5
Dark: 0x629e533c0262e927
AFbody (af/yf/tf/ef)
Light: 0xb4cdc208d8d51bf0
Dark: 0x185d7126c73dc404
AMface (am only)
Light: 0x6f853f0e35157e24
Dark: 0x6ca41c919ece1be0
YMface (ym/tm)
Light: 0x598325880b644f6c
Dark: 0x59a633f6fb9d4a58
EMface (em only)
Light: 0x7edd5d417bc66680
Dark: 0x21f6bac9b048b934
AMbody (am/ym/tm/em)
Light: 0x4db46d1662895fc3
Dark: 0xb1d30a51a5ed1903
I've attached the original files to this post. I've also included the specular (filenames have _s in them) which affects the shine applied to the skins (whiter = shinier) and the overlays (_o in the filenames) which are used for teeth, tongue, and the overlay of the lip textures. And there are the child, toddler, and baby skins (regular, dark, overlay, and specular) that I could find.
I haven't verified if any of these are shared between ages, but you can get the instance number from the filename - it's the first block of numbers. For example:
puFace_m_0xf27771adae43381f_0x00B2D882-0x00000000-0xF27771ADAE43381F.dds
The instance is 0xf27771adae43381f (same as the last block).
Types should all be 0x00b2d882 and group is always 0x00000000
If you edit the skins, you need to do both a light and dark version of every texture you want to change. Easiest way to make a matching dark version is to copy the default dark version, paste it as a layer overtop your edited skin, and set the layer blend type to Color.
I'm also attaching the original eye textures. I haven't edited these myself but these are the files Aikea edited and got replaced so I'm assuming an edit will work just fine. Again, get the instances to replace from the filename.
These are multi-part RARs (the skins anyway) so extract the first one with 'em all in the same place and the rest will follow.
Use DXT1, DXT3, or DXT5 for the DDS type when saving your edits. Don't use 8.8.8.8 ARGB as it's completely uncompressed and you'll end up with umptyjillion MB textures.
Attached files:
| OriginalSkins.part1.rar (5.00 MB, 234 downloads) - View custom content | ||
                  Size   Packed Ratio  Date   Time     Attr      CRC   Meth Ver
-------------------------------------------------------------------------------
 OriginalSkins/afbody/afBodyDark_m_0x185d7126c73dc404_0x00B2D882-0x00000000-0x185D7126C73DC404.dds
                699192   392129  56% 04-06-09 14:22  .....A.   B4DE846C m5f 2.9
 OriginalSkins/afbody/afBody_m_0xb4cdc208d8d51bf0_0x00B2D882-0x00000000-0xB4CDC208D8D51BF0.dds
                699192   353633  50% 04-06-09 14:22  .....A.   E3B8CC7C m5f 2.9
 OriginalSkins/afbody/afBody_s_0xb4cdc208d8d51bee_0x00B2D882-0x00000000-0xB4CDC208D8D51BEE.dds
                699192   429874  61% 04-06-09 14:22  .....A.   696B2B3C m5f 2.9
 OriginalSkins/afface/afFaceDark_m_0x304910be2cb17463_0x00B2D882-0x00000000-0x304910BE2CB17463.dds
                699192   478596  68% 04-06-09 14:21  .....A.   22EFA2CD m5f 2.9
 OriginalSkins/afface/afFace_m_0x40e5744b0dbfc323_0x00B2D882-0x00000000-0x40E5744B0DBFC323.dds
                699192   245789  35% 04-06-09 14:22  .....A.   A4F21307 m5f 2.9
 OriginalSkins/afface/afFace_o_0x40e5744b0dbfc321_0x00B2D882-0x00000000-0x40E5744B0DBFC321.dds
               1398256   388090  27% 04-06-09 14:22  .....A.   E3103ECE m5f 2.9
 OriginalSkins/afface/afFace_s_0x40e5744b0dbfc33d_0x00B2D882-0x00000000-0x40E5744B0DBFC33D.dds
                699192   307888  44% 04-06-09 14:22  .....A.   02C5C94A m5f 2.9
 OriginalSkins/ambody/amBodyDark_m_0xb1d30a51a5ed1903_0x00B2D882-0x00000000-0xB1D30A51A5ED1903.dds
                699192   428731  61% 04-06-09 14:19  .....A.   6B52E8BC m5f 2.9
 OriginalSkins/ambody/amBody_m_0x4db46d1662895fc3_0x00B2D882-0x00000000-0x4DB46D1662895FC3.dds
                699192   461411  65% 04-06-09 14:22  .....A.   65BB4CCC m5f 2.9
 OriginalSkins/ambody/amBody_s_0x4db46d1662895fdd_0x00B2D882-0x00000000-0x4DB46D1662895FDD.dds
                699192   396398  56% 04-06-09 14:22  .....A.   C3741EC1 m5f 2.9
 OriginalSkins/amface/amFaceDark_m_0x6ca41c919ece1be0_0x00B2D882-0x00000000-0x6CA41C919ECE1BE0.dds
                699192   442475  63% 04-06-09 14:20  .....A.   1CD75070 m5f 2.9
 OriginalSkins/amface/amFace_m_0x6f853f0e35157e24_0x00B2D882-0x00000000-0x6F853F0E35157E24.dds
                699192   220459  31% 04-06-09 14:20  .....A.   FA9E0C74 m5f 2.9
 OriginalSkins/amface/amFace_o_0x6f853f0e35157e26_0x00B2D882-0x00000000-0x6F853F0E35157E26.dds
               1398256   350215  25% 04-06-09 14:20  .....A.   133A9850 m5f 2.9
 OriginalSkins/amface/amFace_s_0x6f853f0e35157e3a_0x00B2D882-0x00000000-0x6F853F0E35157E3A.dds
                699192   140021  20% 04-06-09 14:20  .....A.   59BB778D m5f 2.9
 OriginalSkins/bubody/buBodyDark_m_0xb780860913c152e6_0x00B2D882-0x00000000-0xB780860913C152E6.dds
                174904    37472  21% 04-06-09 14:22  .....A.   B3241597 m5f 2.9
 OriginalSkins/bubody/buBody_m_0x6a00ec677e971da2_0x00B2D882-0x00000000-0x6A00EC677E971DA2.dds
                174904    41239  23% 04-06-09 14:20  .....A.   D1DA1779 m5f 2.9
 OriginalSkins/bubody/buBody_s_0x6a00ec677e971dbc_0x00B2D882-0x00000000-0x6A00EC677E971DBC.dds
                174904    38193  21% 04-06-09 14:20  .....A.   6CEC6E97 m5f 2.9
 OriginalSkins/cubody/cuBodyDark_m_0x3a25b5f4ad0e1731_0x00B2D882-0x00000000-0x3A25B5F4AD0E1731.dds
                699192    87863  --> 04-06-09 14:22  .....A.   27F0C242 m5f 2.9
-------------------------------------------------------------------------------
   18         12410720  5240476  42%       volume 1
|
||
| OriginalSkins.part2.rar (5.00 MB, 190 downloads) - View custom content | ||
                  Size   Packed Ratio  Date   Time     Attr      CRC   Meth Ver
-------------------------------------------------------------------------------
 OriginalSkins/cubody/cuBodyDark_m_0x3a25b5f4ad0e1731_0x00B2D882-0x00000000-0x3A25B5F4AD0E1731.dds
                699192   351648  <-- 04-06-09 14:22  .....A.   3766CB2B m5f 2.9
 OriginalSkins/cubody/cuBody_m_0xa50790b91bbd15a1_0x00B2D882-0x00000000-0xA50790B91BBD15A1.dds
                699192   447436  63% 04-06-09 14:20  .....A.   641AD602 m5f 2.9
 OriginalSkins/cubody/cuBody_s_0xa50790b91bbd15bf_0x00B2D882-0x00000000-0xA50790B91BBD15BF.dds
                699192   437145  62% 04-06-09 14:20  .....A.   C36010EA m5f 2.9
 OriginalSkins/cuface/cuFaceDark_m_0x5a99ddfd77e6d8c6_0x00B2D882-0x00000000-0x5A99DDFD77E6D8C6.dds
                699192   460366  65% 04-06-09 14:22  .....A.   07429FFC m5f 2.9
 OriginalSkins/cuface/cuFace_m_0x8acf6fe36d35c202_0x00B2D882-0x00000000-0x8ACF6FE36D35C202.dds
                699192   222159  31% 04-06-09 14:21  .....A.   6AA31F34 m5f 2.9
 OriginalSkins/cuface/cuFace_o_0x8acf6fe36d35c200_0x00B2D882-0x00000000-0x8ACF6FE36D35C200.dds
               1398256   396024  28% 04-06-09 14:21  .....A.   A65B4FD2 m5f 2.9
 OriginalSkins/cuface/cuFace_s_0x8acf6fe36d35c21c_0x00B2D882-0x00000000-0x8ACF6FE36D35C21C.dds
                699192   135773  19% 04-06-09 14:21  .....A.   5E438C79 m5f 2.9
 OriginalSkins/efface/efFaceDark_m_0x629e533c0262e927_0x00B2D882-0x00000000-0x629E533C0262E927.dds
                699192   340874  48% 04-06-09 14:21  .....A.   CB28A4CC m5f 2.9
 OriginalSkins/efface/efFace_m_0x503c527e546e8c5f_0x00B2D882-0x00000000-0x503C527E546E8C5F.dds
                699192   236008  33% 04-06-09 14:21  .....A.   B3EED1A0 m5f 2.9
 OriginalSkins/efface/efFace_o_0x503c527e546e8c5d_0x00B2D882-0x00000000-0x503C527E546E8C5D.dds
               1398256   392648  28% 04-06-09 14:21  .....A.   F460744D m5f 2.9
 OriginalSkins/efface/efFace_s_0x503c527e546e8c41_0x00B2D882-0x00000000-0x503C527E546E8C41.dds
                699192   307888  44% 04-06-09 14:21  .....A.   02C5C94A m5f 2.9
 OriginalSkins/emface/emFaceDark_m_0x21f6bac9b048b934_0x00B2D882-0x00000000-0x21F6BAC9B048B934.dds
                699192   439017  62% 04-06-09 14:20  .....A.   12FEA43B m5f 2.9
 OriginalSkins/emface/emFace_m_0x7edd5d417bc66680_0x00B2D882-0x00000000-0x7EDD5D417BC66680.dds
                699192   218416  31% 04-06-09 14:21  .....A.   2FDEBB8B m5f 2.9
 OriginalSkins/emface/emFace_o_0x7edd5d417bc66682_0x00B2D882-0x00000000-0x7EDD5D417BC66682.dds
               1398256   350215  25% 04-06-09 14:21  .....A.   133A9850 m5f 2.9
 OriginalSkins/emface/emFace_s_0x7edd5d417bc6669e_0x00B2D882-0x00000000-0x7EDD5D417BC6669E.dds
                699192   140021  20% 04-06-09 14:21  .....A.   59BB778D m5f 2.9
 OriginalSkins/pubody/puBodyDark_m_0xa3ada8d8600722b8_0x00B2D882-0x00000000-0xA3ADA8D8600722B8.dds
                699192   365102  --> 04-06-09 14:22  .....A.   77D34F5F m5f 2.9
-------------------------------------------------------------------------------
   15         12585072  5240740  41%       volume 2
|
||
| OriginalSkins.part3.rar (4.49 MB, 177 downloads) - View custom content | ||
                  Size   Packed Ratio  Date   Time     Attr      CRC   Meth Ver
-------------------------------------------------------------------------------
 OriginalSkins/pubody/puBodyDark_m_0xa3ada8d8600722b8_0x00B2D882-0x00000000-0xA3ADA8D8600722B8.dds
                699192    47810  <-- 04-06-09 14:22  .....A.   57B72F94 m5f 2.9
 OriginalSkins/pubody/puBody_m_0x19d137ba2dc4d6cc_0x00B2D882-0x00000000-0x19D137BA2DC4D6CC.dds
                699192   447351  63% 04-06-09 14:23  .....A.   7E298FBB m5f 2.9
 OriginalSkins/pubody/puBody_s_0x19d137ba2dc4d6d2_0x00B2D882-0x00000000-0x19D137BA2DC4D6D2.dds
                699192   403594  57% 04-06-09 14:23  .....A.   9FC55492 m5f 2.9
 OriginalSkins/puface/puFaceDark_m_0x0c922bc29347cbe7_0x00B2D882-0x00000000-0x0C922BC29347CBE7.dds
                699192   466891  66% 04-06-09 14:19  .....A.   4CA9C3C8 m5f 2.9
 OriginalSkins/puface/puFace_m_0xf27771adae43381f_0x00B2D882-0x00000000-0xF27771ADAE43381F.dds
                699192   225264  32% 04-06-09 14:18  .....A.   35F35F4B m5f 2.9
 OriginalSkins/puface/puFace_o_0xf27771adae43381d_0x00B2D882-0x00000000-0xF27771ADAE43381D.dds
               1398256   396122  28% 04-06-09 14:18  .....A.   CC51CAE7 m5f 2.9
 OriginalSkins/puface/puFace_s_0xf27771adae433801_0x00B2D882-0x00000000-0xF27771ADAE433801.dds
                699192   135773  19% 04-06-09 14:18  .....A.   5E438C79 m5f 2.9
 OriginalSkins/yfface/yfFaceDark_m_0x366fb0326a0319ab_0x00B2D882-0x00000000-0x366FB0326A0319AB.dds
                699192   478596  68% 04-06-09 14:21  .....A.   22EFA2CD m5f 2.9
 OriginalSkins/yfface/yfFace_m_0x66f8047c00c00cbb_0x00B2D882-0x00000000-0x66F8047C00C00CBB.dds
                699192   245408  35% 04-06-09 14:21  .....A.   A1C79C6F m5f 2.9
 OriginalSkins/yfface/yfFace_o_0x66f8047c00c00cb9_0x00B2D882-0x00000000-0x66F8047C00C00CB9.dds
               1398256   392648  28% 04-06-09 14:21  .....A.   F460744D m5f 2.9
 OriginalSkins/yfface/yfFace_s_0x66f8047c00c00ca5_0x00B2D882-0x00000000-0x66F8047C00C00CA5.dds
                699192   307888  44% 04-06-09 14:21  .....A.   02C5C94A m5f 2.9
 OriginalSkins/ymface/ymFaceDark_m_0x59a633f6fb9d4a58_0x00B2D882-0x00000000-0x59A633F6FB9D4A58.dds
                699192   442474  63% 04-06-09 14:19  .....A.   1CD75070 m5f 2.9
 OriginalSkins/ymface/ymFace_m_0x598325880b644f6c_0x00B2D882-0x00000000-0x598325880B644F6C.dds
                699192   220840  31% 04-06-09 14:19  .....A.   D4E74D5C m5f 2.9
 OriginalSkins/ymface/ymFace_o_0x598325880b644f6e_0x00B2D882-0x00000000-0x598325880B644F6E.dds
               1398256   350215  25% 04-06-09 14:19  .....A.   133A9850 m5f 2.9
 OriginalSkins/ymface/ymFace_s_0x598325880b644f72_0x00B2D882-0x00000000-0x598325880B644F72.dds
                699192   140021  20% 04-06-09 14:19  .....A.   59BB778D m5f 2.9
 OriginalSkins/afbody
                     0        0   0% 23-06-09 23:17  .D.....   00000000 m0  2.0
 OriginalSkins/afface
                     0        0   0% 23-06-09 23:17  .D.....   00000000 m0  2.0
 OriginalSkins/ambody
                     0        0   0% 23-06-09 23:20  .D.....   00000000 m0  2.0
 OriginalSkins/amface
                     0        0   0% 23-06-09 23:19  .D.....   00000000 m0  2.0
 OriginalSkins/bubody
                     0        0   0% 23-06-09 23:25  .D.....   00000000 m0  2.0
 OriginalSkins/cubody
                     0        0   0% 23-06-09 23:25  .D.....   00000000 m0  2.0
 OriginalSkins/cuface
                     0        0   0% 23-06-09 23:26  .D.....   00000000 m0  2.0
 OriginalSkins/efface
                     0        0   0% 23-06-09 23:18  .D.....   00000000 m0  2.0
 OriginalSkins/emface
                     0        0   0% 23-06-09 23:24  .D.....   00000000 m0  2.0
 OriginalSkins/pubody
                     0        0   0% 23-06-09 23:28  .D.....   00000000 m0  2.0
 OriginalSkins/puface
                     0        0   0% 23-06-09 23:28  .D.....   00000000 m0  2.0
 OriginalSkins/yfface
                     0        0   0% 23-06-09 23:18  .D.....   00000000 m0  2.0
 OriginalSkins/ymface
                     0        0   0% 23-06-09 23:25  .D.....   00000000 m0  2.0
 OriginalSkins
                     0        0   0% 23-06-09 23:28  .D.....   00000000 m0  2.0
-------------------------------------------------------------------------------
   28         11885880  4700895  39%       volume 3
|
||
| OriginalEyes.rar (36.7 KB, 241 downloads) - View custom content | ||
                  Size   Packed Ratio  Date   Time     Attr      CRC   Meth Ver
-------------------------------------------------------------------------------
 OriginalEyes/amFaceEyeColor_o_0xc2b560673f00d806_0x00B2D882-0x00000000-0xC2B560673F00D806.dds
               1398256     8078   0% 04-06-09 14:21  .....A.   0E562DE2 m5f 2.9
 OriginalEyes/amFaceEyePattern_ma_0x4d6789c9e613edfa_0x00B2D882-0x00000000-0x4D6789C9E613EDFA.dds
               1398256    11741   0% 04-06-09 14:21  .....A.   9096AB5B m5f 2.9
 OriginalEyes/amFaceEyePattern_o_0x2259d92cc658f431_0x00B2D882-0x00000000-0x2259D92CC658F431.dds
               1398256    17252   1% 04-06-09 14:20  .....A.   1A04AAAD m5f 2.9
 OriginalEyes
                     0        0   0% 23-06-09 23:32  .D.....   00000000 m0  2.0
-------------------------------------------------------------------------------
    4          4194768    37071   0%
|
||
my simblr (sometimes nsfw)
“Dude, suckin’ at something is the first step to being sorta good at something.”
Panquecas, panquecas e mais panquecas.
#18
25th Jun 2009 at 2:54 AM
25th Jun 2009 at 2:54 AM
Posts: 29
Thanks: 3038 in 8 Posts
i cant find this stupid file and it is driving me cazy
Electronic Arts\The Sims 3\GameData\Shared\Packages
(\__/)
( ^.^)
(")__(")98% of teenagers do or has tried smoking pot. If you're one of the 2% who hasn't, copy & paste this in your siggy.
Electronic Arts\The Sims 3\GameData\Shared\Packages
(\__/)
( ^.^)
(")__(")98% of teenagers do or has tried smoking pot. If you're one of the 2% who hasn't, copy & paste this in your siggy.
Test Subject
#19
25th Jun 2009 at 3:14 AM
25th Jun 2009 at 3:14 AM
Posts: 1
margh, why do I stumble upon this thread NOW... after it took me about a day do figure all that out myself ^^ I was looking for a tutorial like this, but unfortunately i might have used the wrong keywords in search.
Well but one thing I do have to admit, in S3PE (thats what I use to unpack and repack) when repacking the files "don't" use compression, otherwise the game crashes more likely. Also you don't have to bother about Mipmaps, the game generates them itself. Exporting with Mipmaps caused disarranged images in my case... whatever. If you suffer the same Problem, try it without
@theonlyonetwo:
you find the Files in Electronic Arts]\The Sims 3\Game Data\Shared\Packages\FullBuild2.Package thats where all the dds files are located.
To get a better selection and overview ive unpacked all that which counts up to 4.5Gigs
Progs and Utilities I used:
S3PE
Nvidia DDS Plugin for Adobe PS
Adobe PS CS4
... I think that was it
#20
25th Jun 2009 at 4:16 AM
25th Jun 2009 at 4:16 AM
Posts: 29
Thanks: 3038 in 8 Posts
i dont have the game data subfolder so i cant find anything past that part
(\__/)
( ^.^)
(")__(")98% of teenagers do or has tried smoking pot. If you're one of the 2% who hasn't, copy & paste this in your siggy.
(\__/)
( ^.^)
(")__(")98% of teenagers do or has tried smoking pot. If you're one of the 2% who hasn't, copy & paste this in your siggy.
#21
25th Jun 2009 at 6:12 AM
25th Jun 2009 at 6:12 AM
Posts: 487
Thanks: 29003 in 78 Posts
Quote: Originally posted by theonlyonetwo
| i dont have the game data subfolder so i cant find anything past that part |
are you making sure to look in program files, not my documents?
#22
26th Jun 2009 at 5:21 AM
26th Jun 2009 at 5:21 AM
Posts: 2,461
Thanks: 1848 in 12 Posts
Thank you, thank you, thank you for this tutorial! Today I was able to make these money tree replacements (and I just used Paint Shop Pro 9 with the DDS plug-in, didn't bother with GIMP because I don't have it). I was just going to make green but Syera wanted pink, so I ended up making both colors. Naturally, only one can be used at a time but I think either color will look much better with landscaping than the default texture.

If anyone would like them, I have uploaded them to BogSims.
If anyone would like them, I have uploaded them to BogSims.
Test Subject
#23
26th Jun 2009 at 8:07 AM
26th Jun 2009 at 8:07 AM
Posts: 3
I was able to use this method to replace the Giraffe picture with Chi from Chobits. Interestingly, since I already had the giraffe picture in my house, it STAYED the giraffe picture, but when I placed a new one, it was Chi. I'm guessing this is because the previous giraffe picture was stored in my simCompositorCache.package.
#24
26th Jun 2009 at 1:48 PM
Last edited by Syera : 26th Jun 2009 at 3:33 PM.
26th Jun 2009 at 1:48 PM
Last edited by Syera : 26th Jun 2009 at 3:33 PM.
Posts: 175
Thanks: 5143 in 28 Posts
Quote: Originally posted by HystericalParoxysm
| I'm also attaching the original eye textures. I haven't edited these myself but these are the files Aikea edited and got replaced so I'm assuming an edit will work just fine. Again, get the instances to replace from the filename. |
PSP won't open them. Says it can't read the requested format.
Edit: Scratch that; PSP won't open anything I extract with s3pe, despite my having the DDS plugin.
#25
26th Jun 2009 at 2:03 PM
26th Jun 2009 at 2:03 PM
Posts: 41
Thanks: 3332 in 9 Posts
this is a great tutorial very simple and it worked thanks so much for sharing 

Who Posted
|
|