 Sign in to Mod The Sims
- Site Map >
- Modding and Creation >
- Sims 3 Creation >
- Building >
- Tutorial: Making Inexpensive (often free) Wall Décor for Base Game Uploads
- Site Map >
- Modding and Creation >
- Sims 3 Creation >
- Building >
- Tutorial: Making Inexpensive (often free) Wall Décor for Base Game Uploads
Replies: 1 (Who?), Viewed: 4293 times.

#1
 1st Sep 2014 at 1:15 AM
Last edited by tsyokawe : 22nd Jan 2015 at 6:55 PM.
Reason: rearranging screenshots...
1st Sep 2014 at 1:15 AM
Last edited by tsyokawe : 22nd Jan 2015 at 6:55 PM.
Reason: rearranging screenshots...
1st Sep 2014 at 1:15 AM
Last edited by tsyokawe : 22nd Jan 2015 at 6:55 PM.
Reason: rearranging screenshots...
Tutorial: Making Inexpensive (often free) Wall Décor for Base Game Uploads
Objective: To make attractive wall décor that doesn’t cost a sim arm and a sim leg. 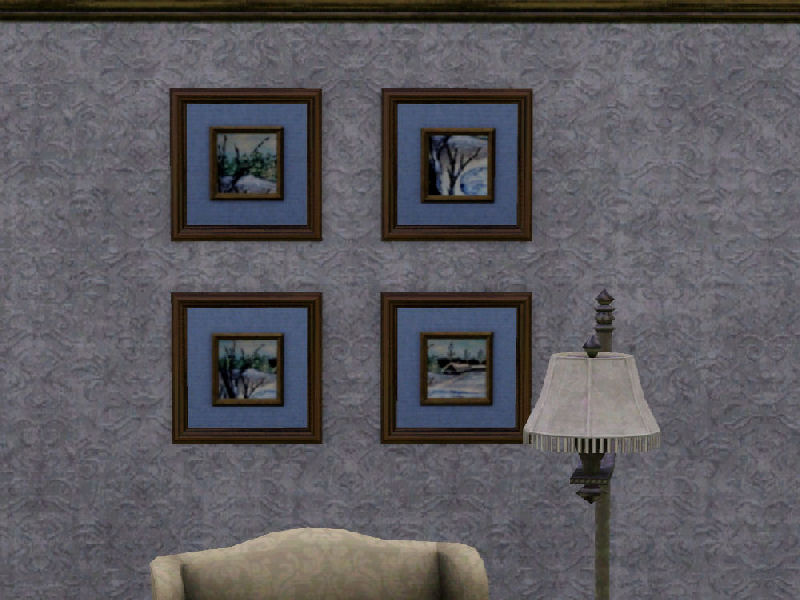
Using your cellphone camera, you can take pictures of anything:
plants; people; home appliances; vignettes even.
And all this stuff can even come from your EPs.
Because it’s the image of the object that’s captured - not the actual object.
Cellphone images cost zero simoleons, though after a day on the wall, some gain value. I’ve seen as much as a 50 simoleons gain in the first 24 hours.
Supplies: Basegame Cellphone; Wall; Wallpaper; Lighting; Objects; VelocityGrass’ SOMPA mod; and a Sim with mad photography skills.
When arranging a vignette, you may also need:
Granthes’ OMSP mod;
Newshoes’ TIPSY mod; and/or
Buhudain’s RESIZER mod.
Your best Sim for this project will be one with a Photography skill level of 10. If you don’t already have a Sim with photo skills,
you might wish to use NRaas’ MasterController (Sim>Advanced>Skill Level) to up her skills instantly.
If you want Brilliant and Masterpiece quality paintings, go ahead and up her painting skills while you’re at it.
It will help to give her Artistic, Photographer’s Eye, and Perfectionist traits. I also used lifetime reward points to make mine Extra Creative.
Setting up:
1. Make a room with invisible wall and ceiling lights and the wallpapers you might want for matting. Put down tiles of patterned flooring that will help you place your sim in the best possible position for photographing images on the wall. I use the jigsaw rug pattern.
2. Set your Game Options to remove free will from your active sim, and click on the mailbox to make her needs static.
I now actually keep a special sim in my library whose sole purpose is to take photos.
She has painting and photo skills. And in her personal inventory, she has many, many large paintings that I can take photos of.
I also now have a special lot in Sunset Valley that is nothing but a giant room with different wallpapers, and lots of invisible wall and ceiling lights. The lights can have their colours and intensity set and reset. They can be moved around to suit my needs.

*+*+*+*
Making a basic picture is as easy as clicking on your cellphone to take a picture.
You just need to make sure your Sim is standing near the item(s) you want photographed. This is something you’ll want to adjust at the time.
Also be sure that the item is well-lit.
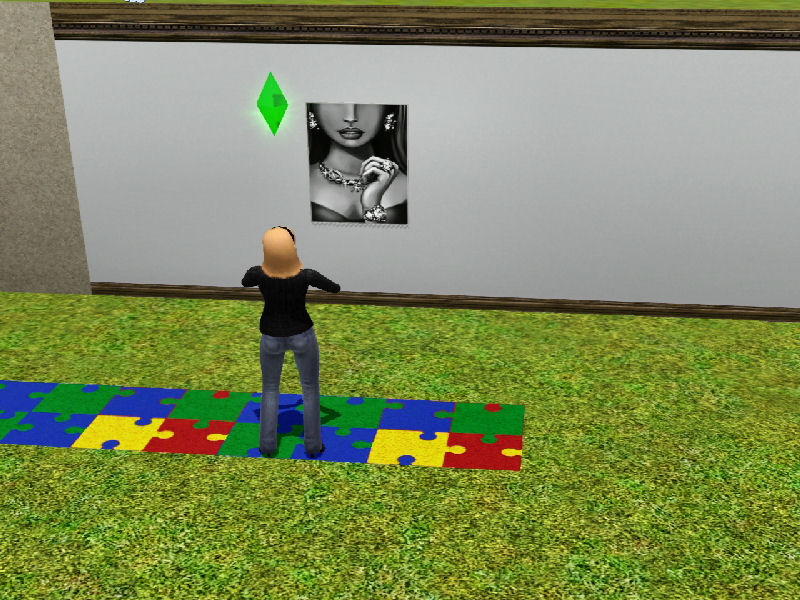
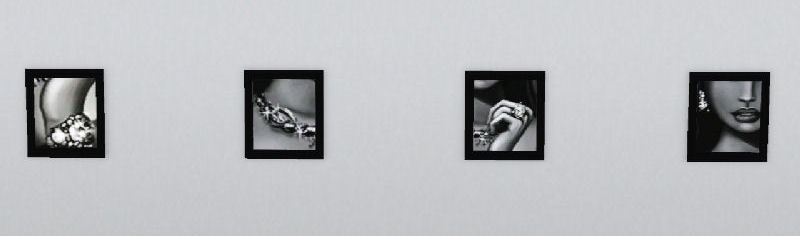
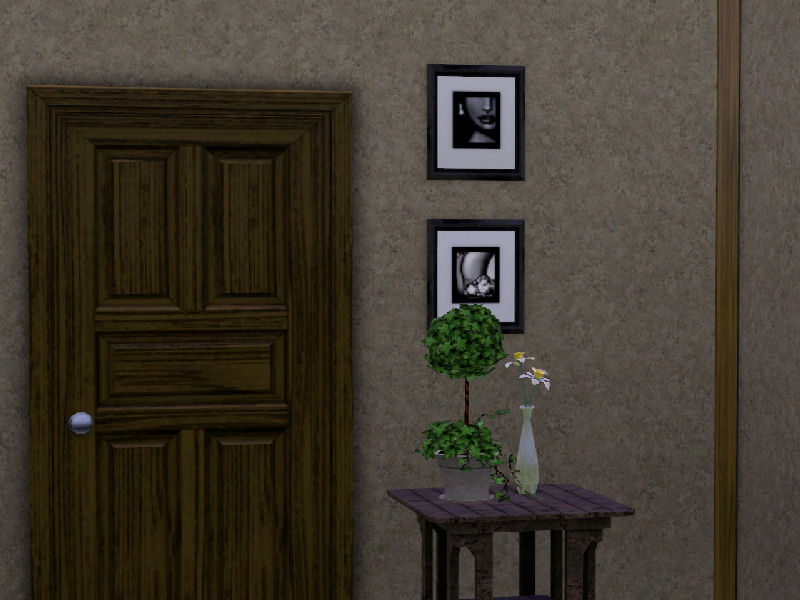
1. Have your Sim take a photo/photos. This photo can be of a person (candid or posed), a painting, flowers, bushes, a tree,
any kind of scenery, any object…or even a group of objects. My Sim will be photographing sections of the She Sparkles black and white photograph from the Ambitions EP.
2. Once you’ve taken a photo, you’ll find it in your Sim’s personal inventory. Click on the backpack, and it will be at the very
end/bottom of her inventory in a tannish light brown frame.
3. Drag the selected photo to whichever wall you want. Sometimes it’s easier to go to Build Mode once you’ve dragged the photo out of the inventory.
That way you can move the picture around – up and down, etc. The frame is a wood texture, and will go with most stuff.
So, if you like it this way, you can leave it just as it is.
It can be just that simple…OR
4. You can change the texture and/or colour of the photo’s frame.
CASt the frame, and choose a texture and colour you want.
Don’t be alarmed when CASting the cellphone photo frame changes it to a two-toned colour.
If you have VelocityGrass’ SOMPA mod, this is quickly and easily fixed. While in the CASt, type in the cheat, <deco m>,
and the frame will be cast entirely in the texture you’ve chosen. It will lighten up a bit when you do this,
so you’ll want to experiment making the texture/colour a little darker than you actually want it.
I CASt these frames in black, because I thought it might maintain the illusion that these were actually black and white photographs.
Now, you can call this good…OR
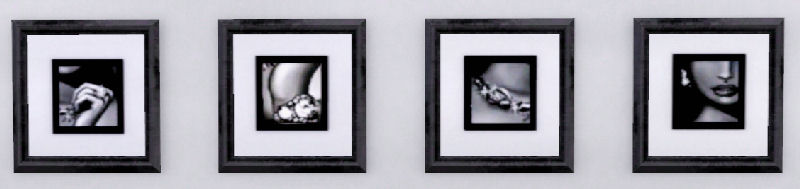
5. You can give the impression that your image is matted.
In a well-lit place (outdoors, even), put up a temporary wall – one tile for each photo you’ll be adding the matting to.
So that you can better judge your Sim’s distance from each photo, place temporary flooring a tile (or two, or three) out from the wall…depending.
Wallpaper the wall in whatever colour and texture you want the matting. Keep in mind that they will darken some in the new photos.
6. Place the photos (that you want “matted”) on that wall, one tile apart from each other.
7. Tell your sim to “go here,” to a point about two or three tiles out, and have her take new photos. Zoom out or in to a point that adds
part of the wall. Voila, you have matting and a new outer frame. The flooring will help you figure out exactly where your sim needs to stand.
I have learned to either zoom all the way in or all the way out. So I have my sim stand in a spot that will make that zoom include
the right amount of wall in the background.
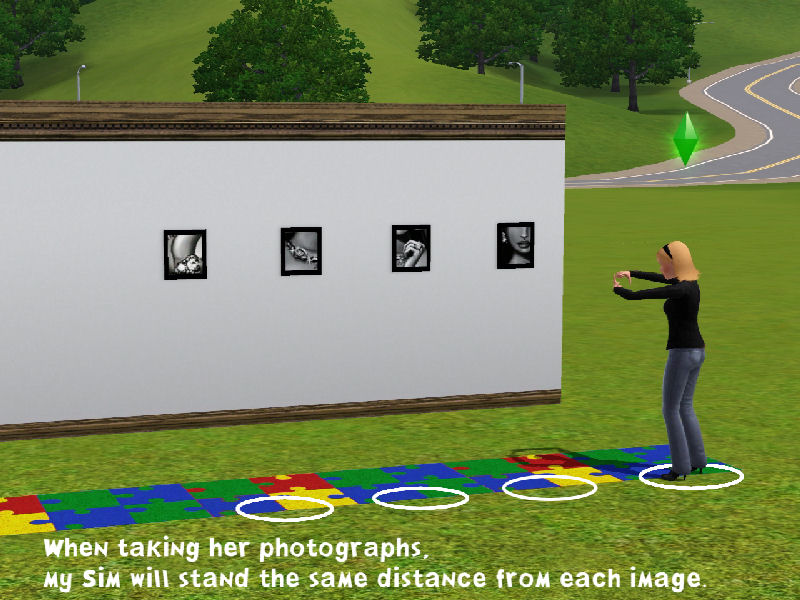
If you’re making a set of photos, have your sim stand at the same distance in front of each photo you are capturing.
Tip: Don't take down the original photos from the temporary wall until you’ve placed the new photos where you want them.
Seeing them in their permanent spot, you may find that you’ll want to adjust the colours/textures.
These new images will have two frames: the original frame and a new one outside the matting. Bear this in mind when CASting the original frame.
You’ll want it to coordinate with both the matting and the new, outer frame.
Tips and Ideas
You may wish to name/number your cellphone photos. When they’re in your Sim’s personal inventory, the cellphone photos all look alike.
If you name them, it will help you keep track of them. This goes for paintings, as well.
The cellphone’s photos are small. In real life, they’d probably be about 12” squares.
There are places where a solitary picture this small might do, but for the best effect, you’ll probably want a group of them.
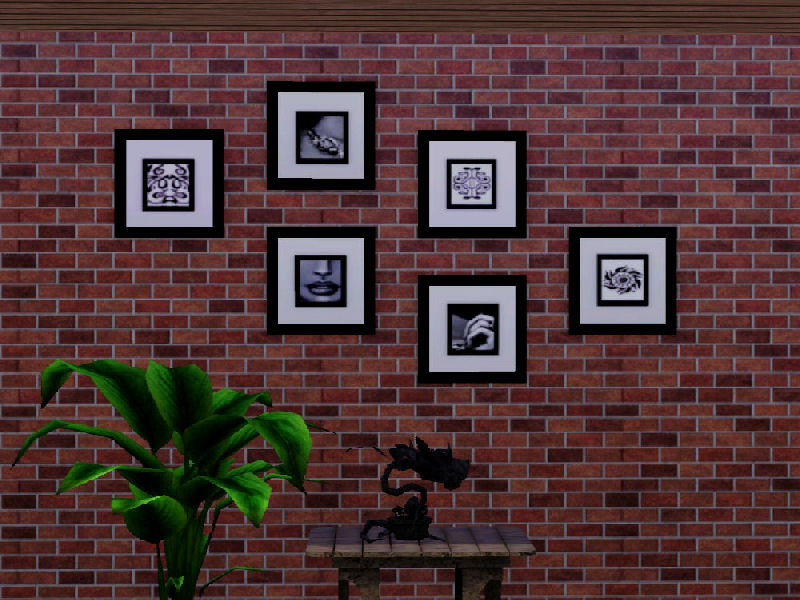
You can arrange them in rows or in columns, or you can play with them to make it look like they’re part of an asymmetrical grouping.
If you have World Adventures, you can take photos in black and white or sepia. Use the most expensive camera for the best images.
You’ll find this camera in buydebug. It’s called the Hikon QX40di Gladiator, and sells for §3250.
Take your original photo with the WA camera, but if you’re uploading a Basegame Only house, be sure to capture the WA photo with your cellphone so that it will be a base game object. (More about using/converting WA photos in Part 2)
If you’re going for a dramatic look, especially in a modern home, black and white photos in a black frame can really make your room.
You can place the black-framed photos on a white wall, and after you’ve captured that image with your cellphone,
you can CASt the new frame in black, as well. The inner black frame will look like black matting.
And for those old, dilapidated, or historical houses, the sepia tone can give your images an aged look.
The matting can be an off white or sepia colour, or even wood to give the appearance of a very thick wooden frame.
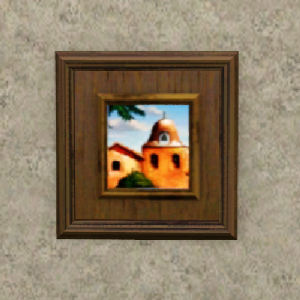
(The wood “matting” looks really cool on scenery or when making a set from multiple photos of the
Mission at Noon painting found in Wall Decorations.)
For some pictures, you may want to include <deco p> with your <deco m> when modding the original frame.
This will dull most of the frame’s shininess. Type in <deco pm> in such cases. This especially might become
important when you are adding matting and a new outer frame.
You can set up a vignette. Place objects on a table, using whatever OMSP mods you need.
Put up a backdrop in whatever textures or colours you want.
You can take pictures of wall décor from EPs or from paintings your Sim has done. In fact, one way
to make an attractive grouping is to have your sim take several photos of different sections of the same painting.
(The screenshot at the very beginning of this tutorial is a grouping of four photos taken of a large painting - a winter scene.)
You will want to experiment. Lighting (both colour and intensity), texture and CASt colour choices of the two frames
and the wallpaper (matting) will all depend on the colours in your original photo and the colours in whatever room you’re decorating.
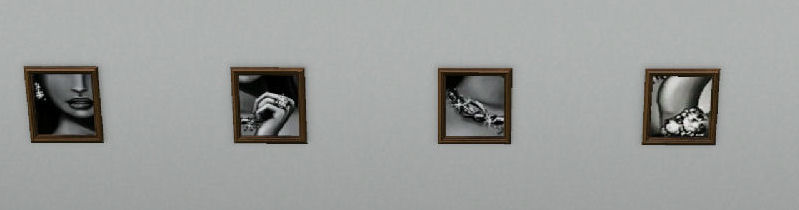
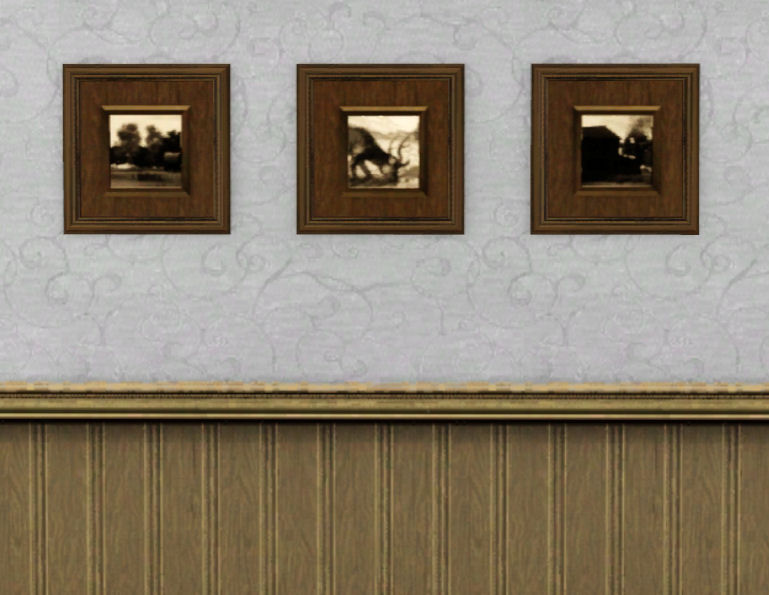
For example, when working with Sepia, the colour of your room’s lighting can make a difference in brightness and saturation
of the brown/pink tones. The following screenshot is of pictures that were first taken in black and white with a WA camera. I used lighting afterwards to give them the appearance of browning. I set the colour: 131,103,67 - which is a reddish brown. I lit them with horizontal lights set about a tile and a half away at an intensity of 0.4
Some of this might take a little practice, but it will be worth it. You can save oodles of simoleons for your Sims.
Also, this will help you make your Starter Homes more appealing to future downloaders.
I hope this tutorial helps other builders who want to make less expensive houses for base game users.
#wall décor #inexpensive #building #decoration #basegame #noCC #tutorial #miscellaneous #cellphone #creator uploads #starter home
Advertisement
#2
2nd Sep 2014 at 5:00 PM
2nd Sep 2014 at 5:00 PM
Who Posted
|
|