 Sign in to Mod The Sims
 Replacement Skintone Sliders for Patch 1.38: Desaturated or Realistic
 Replacement Skintone Sliders for Patch 1.38: Desaturated or Realistic

138aquaturquoise_CAS.jpg - width=1269 height=942
138aquaturquoise_DESATURATED_CAS.jpg - width=1269 height=942
goldorange_138_CAS.jpg - width=1270 height=938
goldorange_138_DESATURATED_CAS.jpg - width=1269 height=948
greyscale_138_CAS.jpg - width=1268 height=914
patch138_greenblue__DESATURATED_CAS.jpg - width=1272 height=938
patch138_greenblue_CAS.jpg - width=1269 height=949
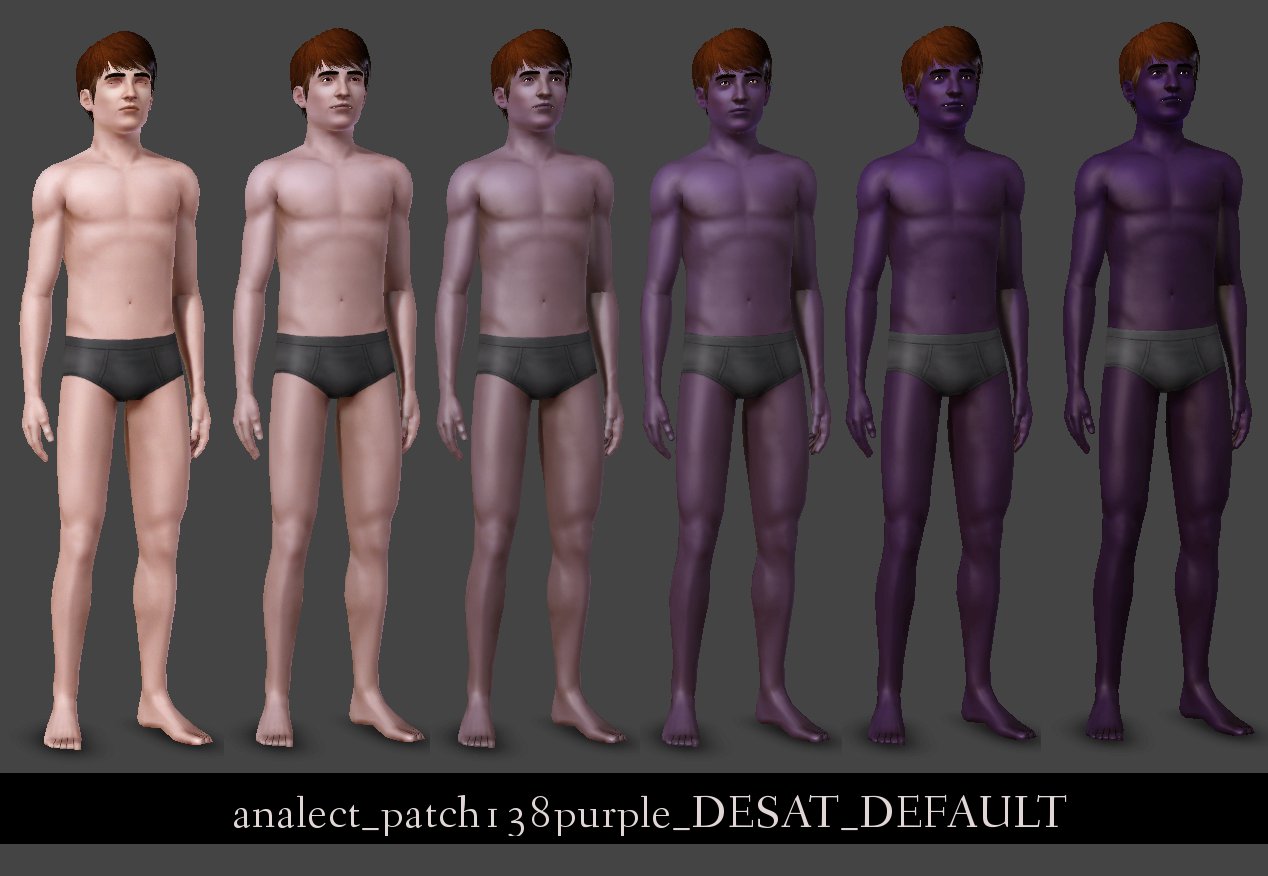
patch138_purple_CAS.jpg - width=1268 height=895
patch138_purple_DESATURATED_CAS.jpg - width=1268 height=876
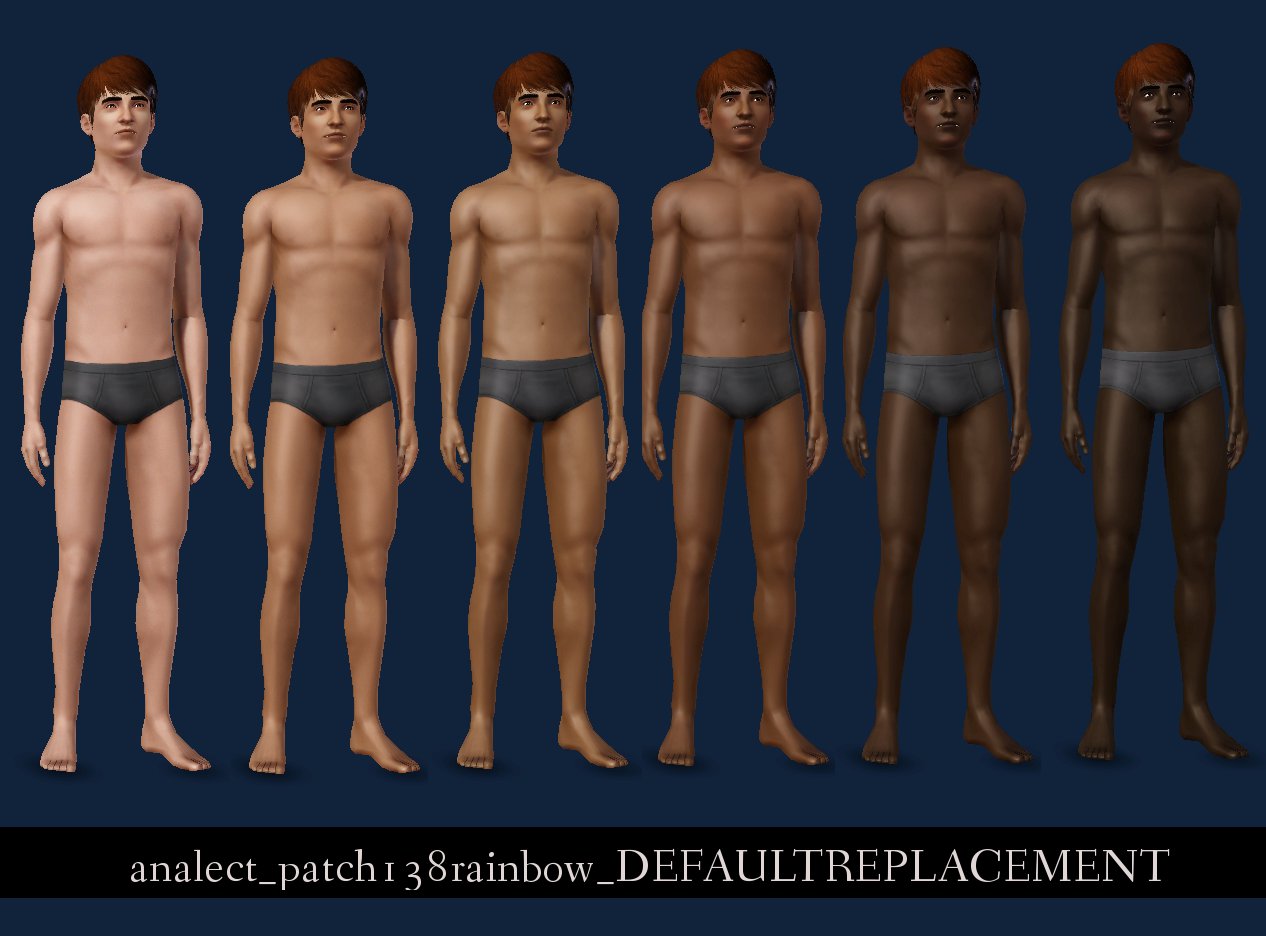
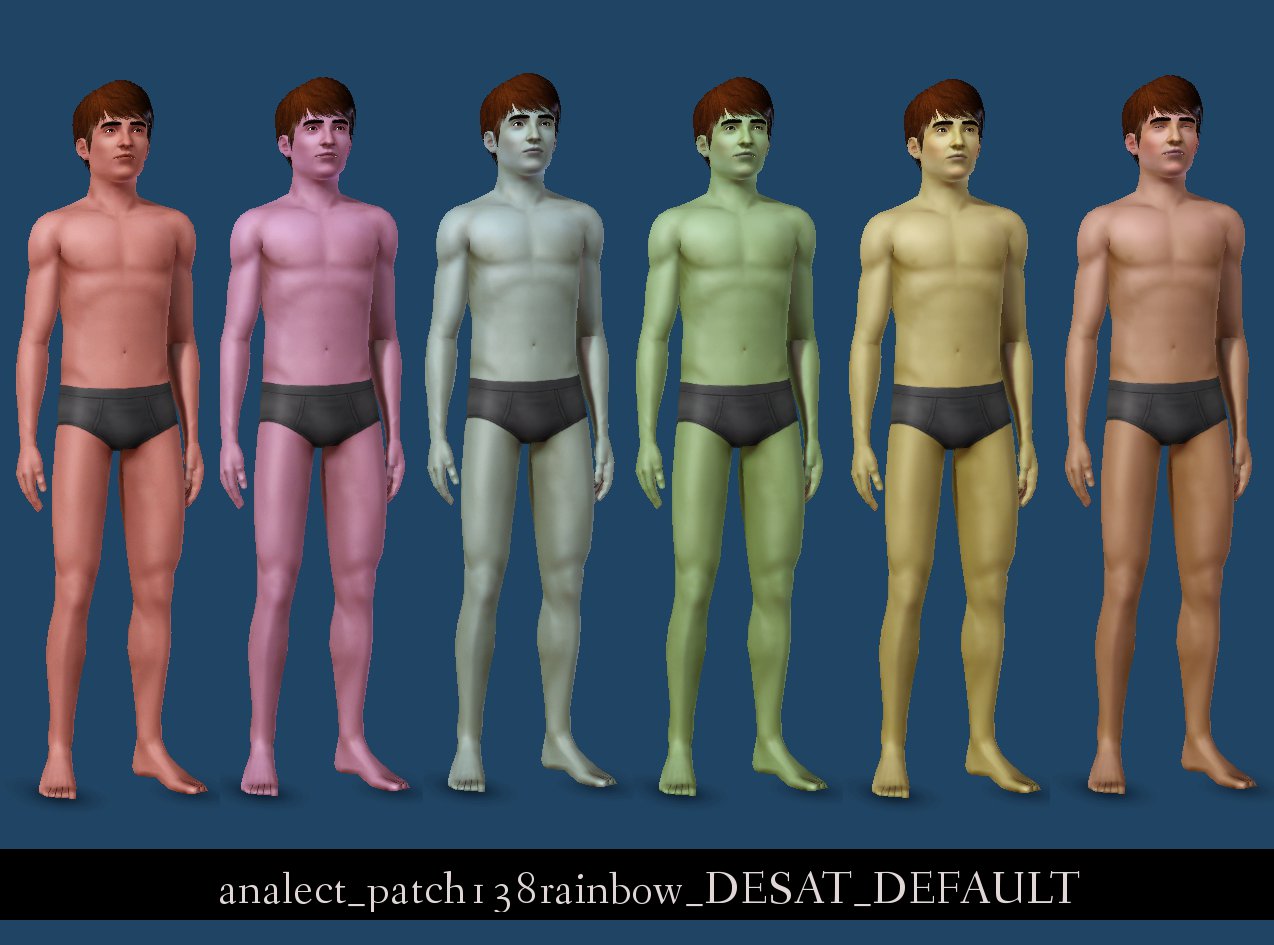
patch138_rainbow_CAS.jpg - width=1266 height=936
patch138_rainbow_DESATURATED_CAS.jpg - width=1274 height=945
realisticreplacements_ingame.jpg - width=1280 height=864


Have you updated to patch 1.38 and wondered what the frack you're meant to do with all these new retina searing skin tone sliders? Maybe you'd like slightly subtler fantasy skin tones, so your fairies and witchy alchemists don't look like they've been dipped in mustard. Maybe you've patched but won't be playing Supernatural, and don't have a need for fantasy skin colours in your game at all.
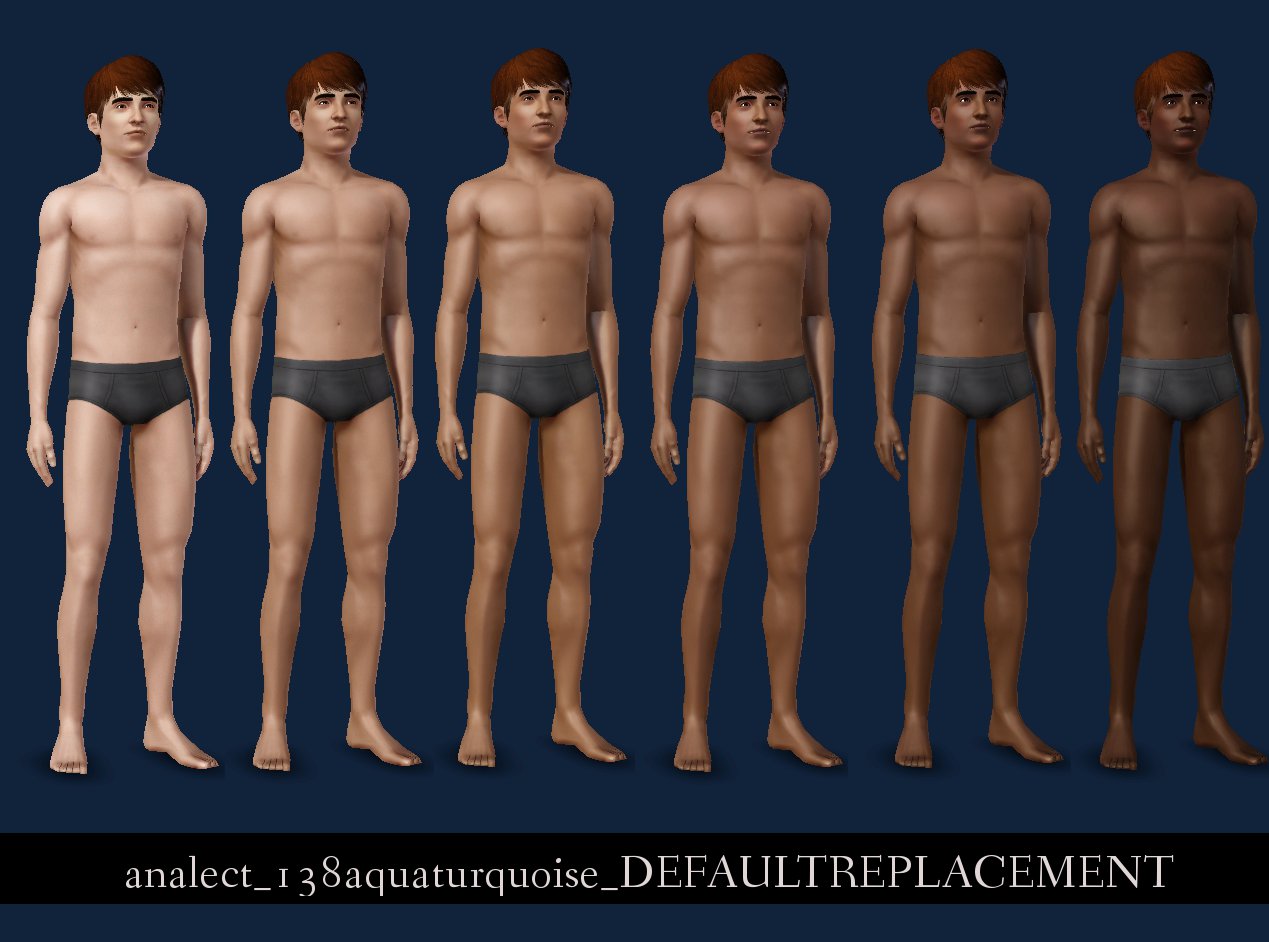
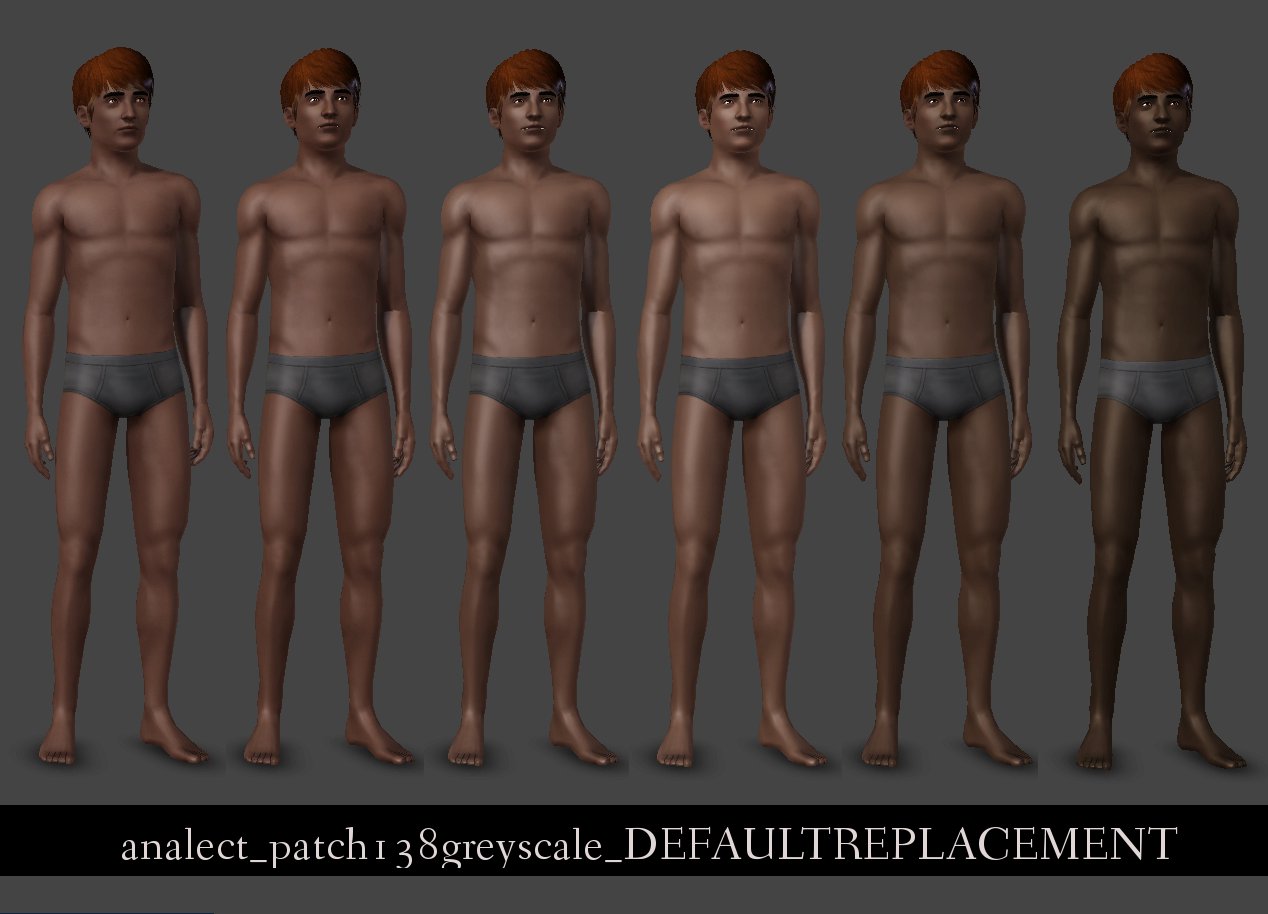
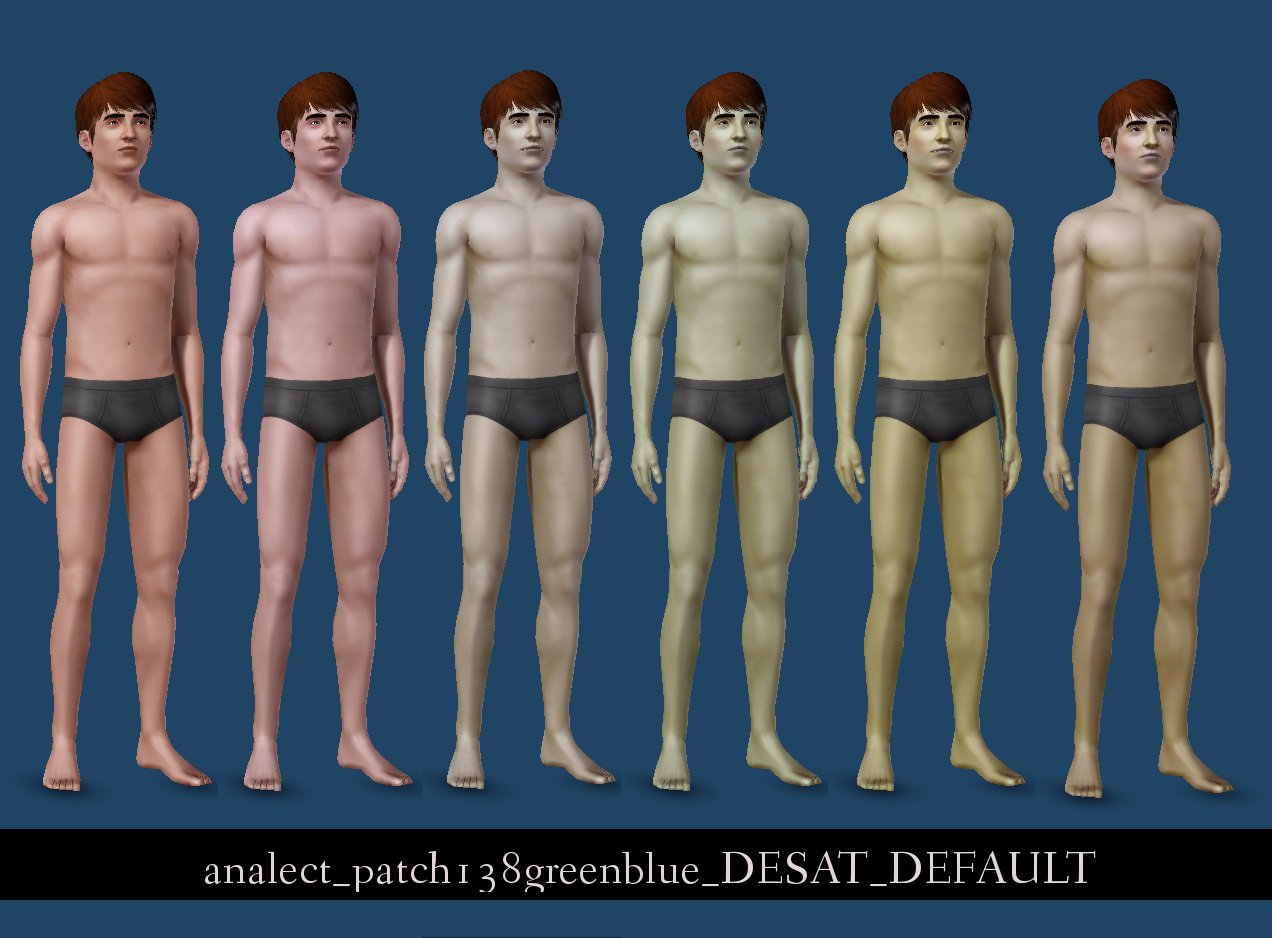
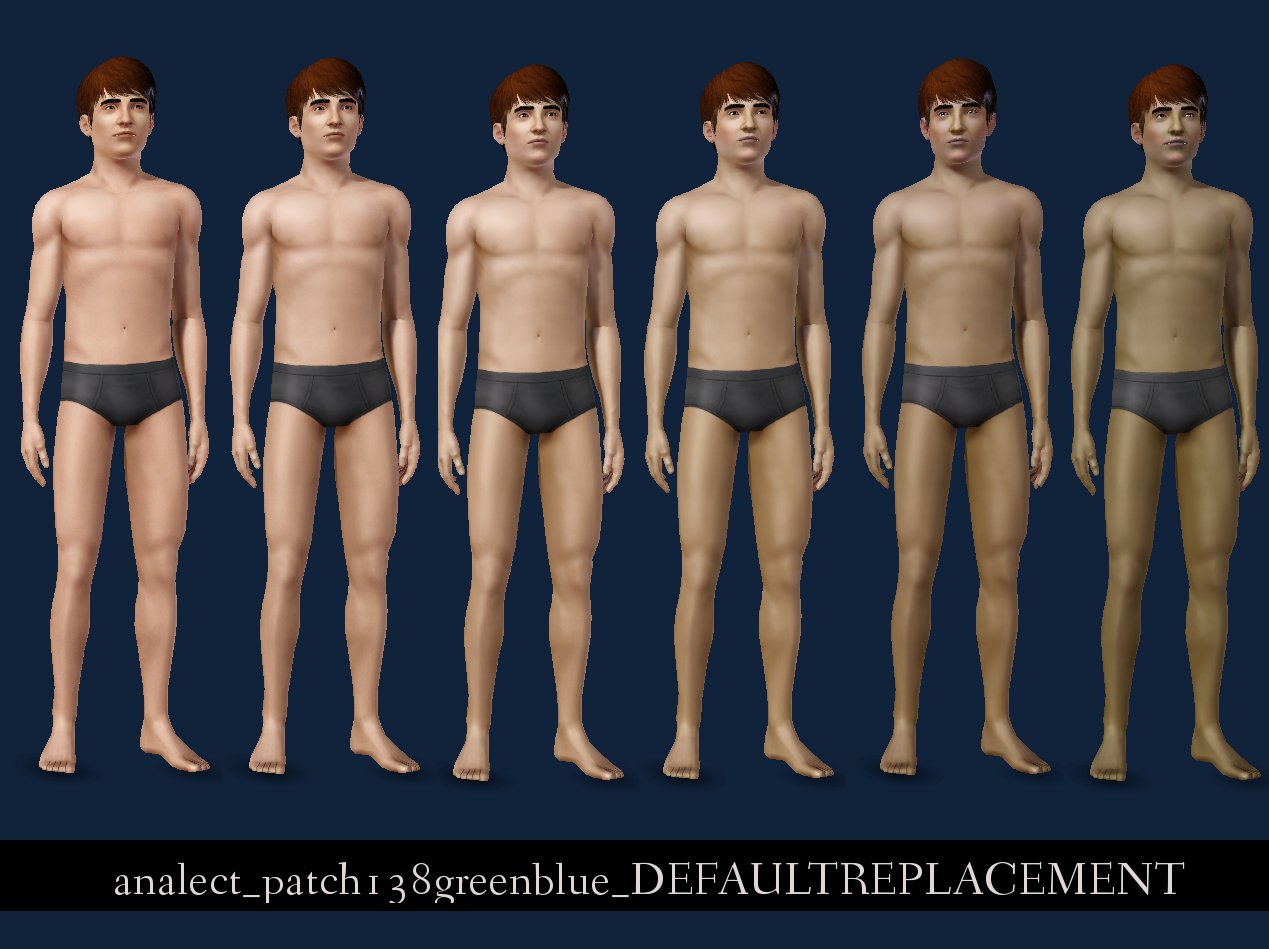
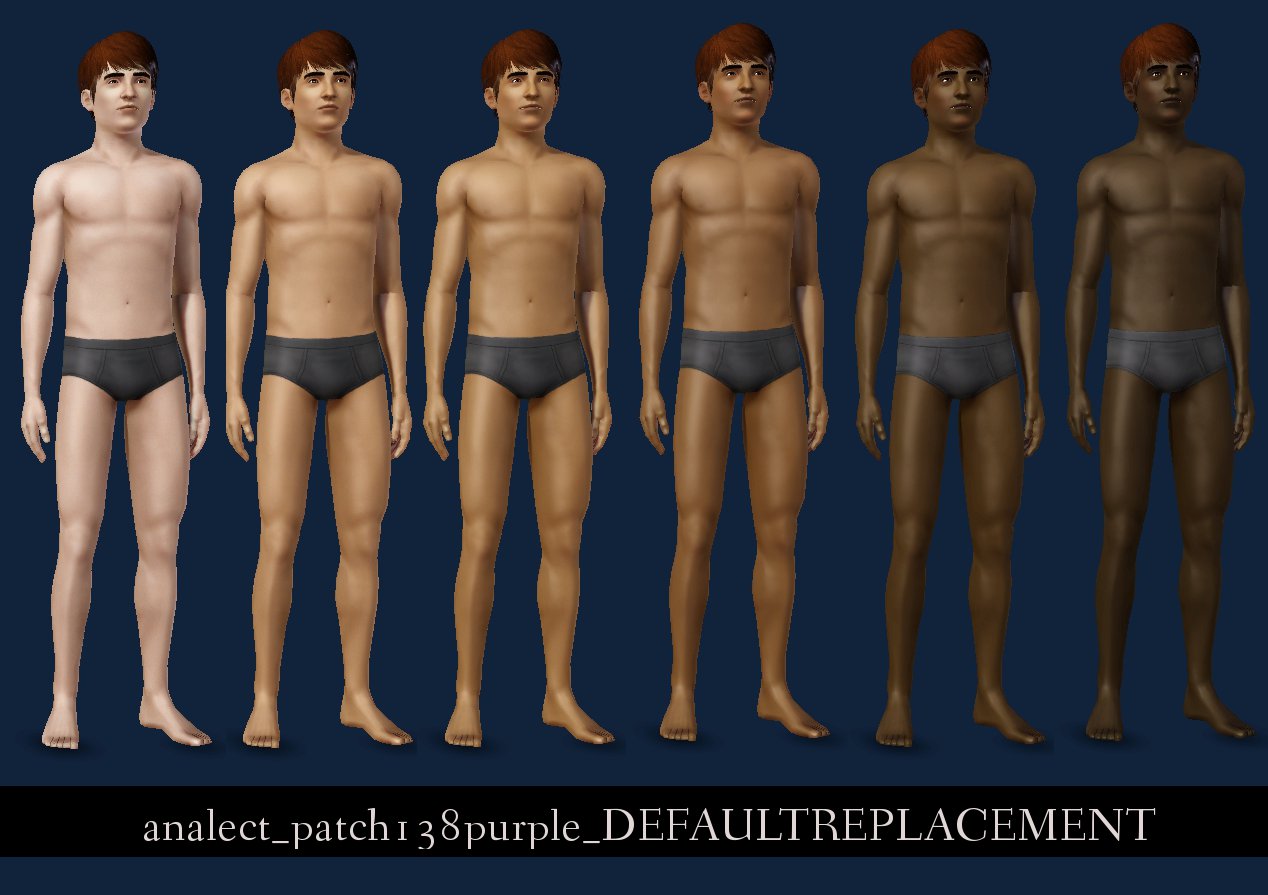
Whichever camp you fall into, I come bearing these default replacement skin tone sliders. These will overwrite the vanilla EA skin sliders in CAS - that's the aqua-turquoise, rainbow, green-blue (pastel rainbow), purple, greyscale/monochrome, and gold-orange colours - so you can replace the patch 1.38 fantasy tone sliders with either slightly desaturated versions, or more realistic, non-fantasy colour ramps.
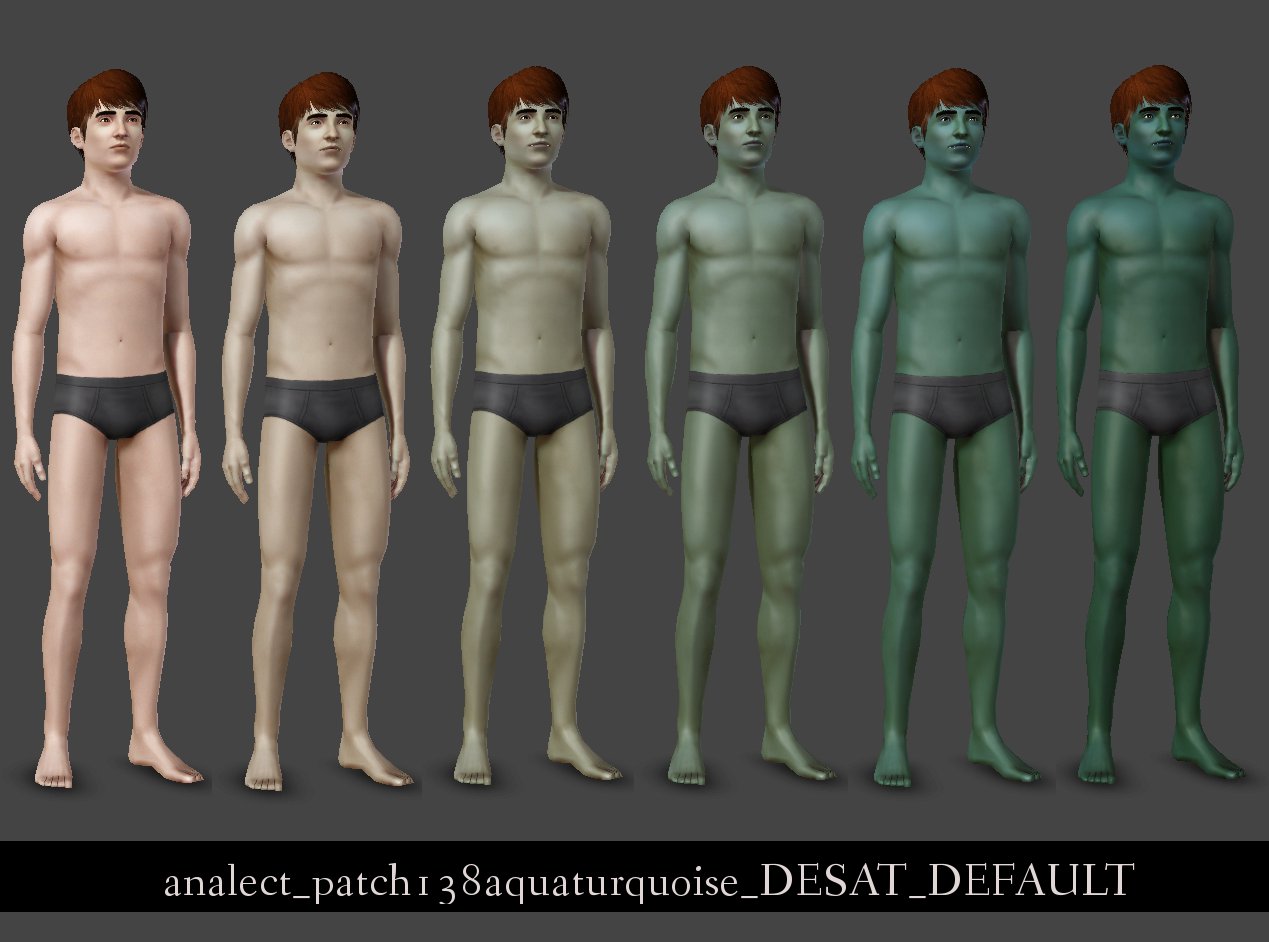
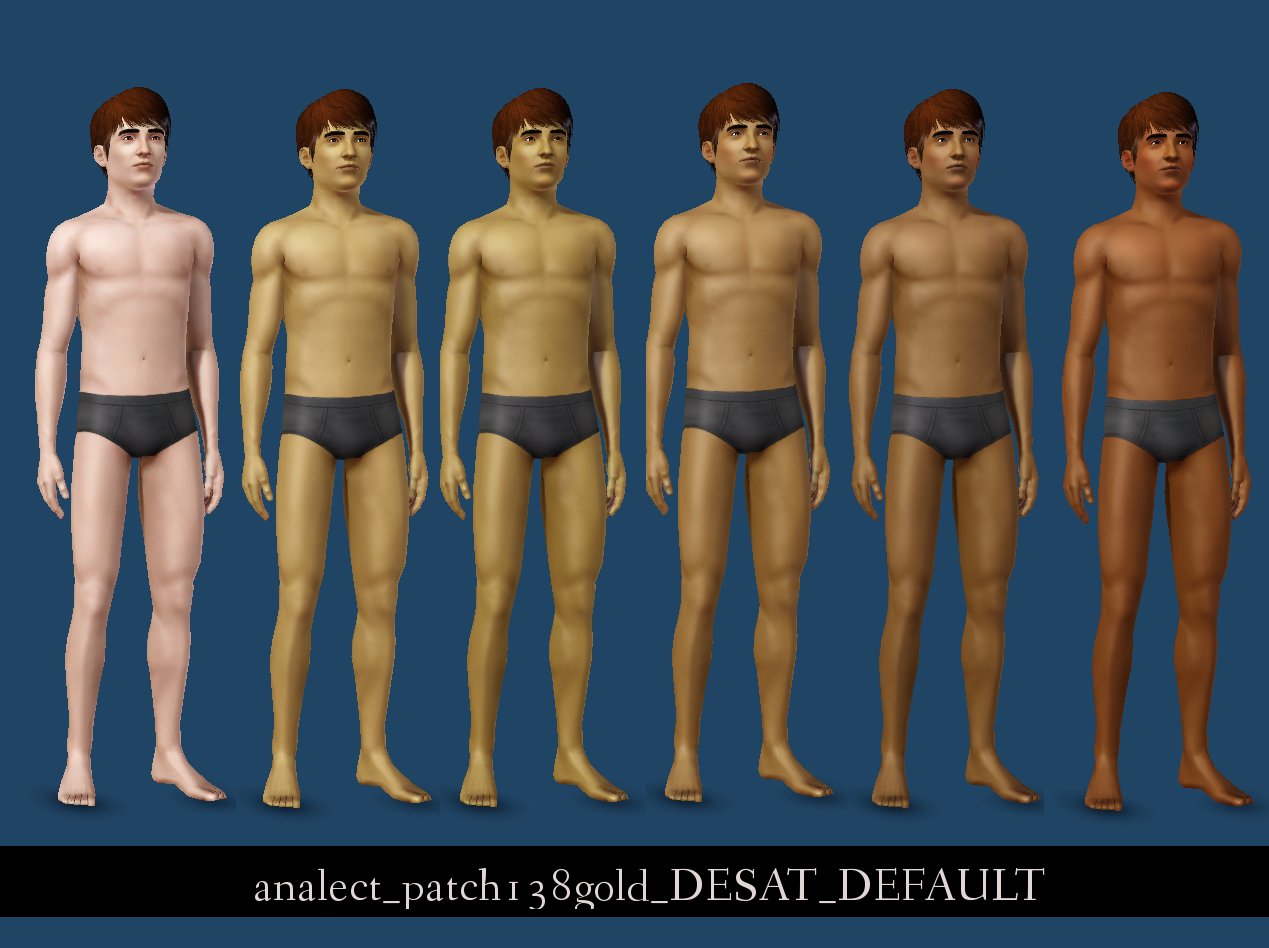
Version 1: Desatured Default Replacements
Exactly what it says on the tin. All I did was just calm down the colours slightly. Full previews in the screenshots. The Aqua-Turquoise slider comes out rather greener than the vanilla version, but I felt that was an acceptable trade-off.

You can download all five desaturated default replacements (I didn't do one for the greyscale slider... obviously!) and pick which ones you want to use, or you can download all five in one combined package, if you want to use them all.
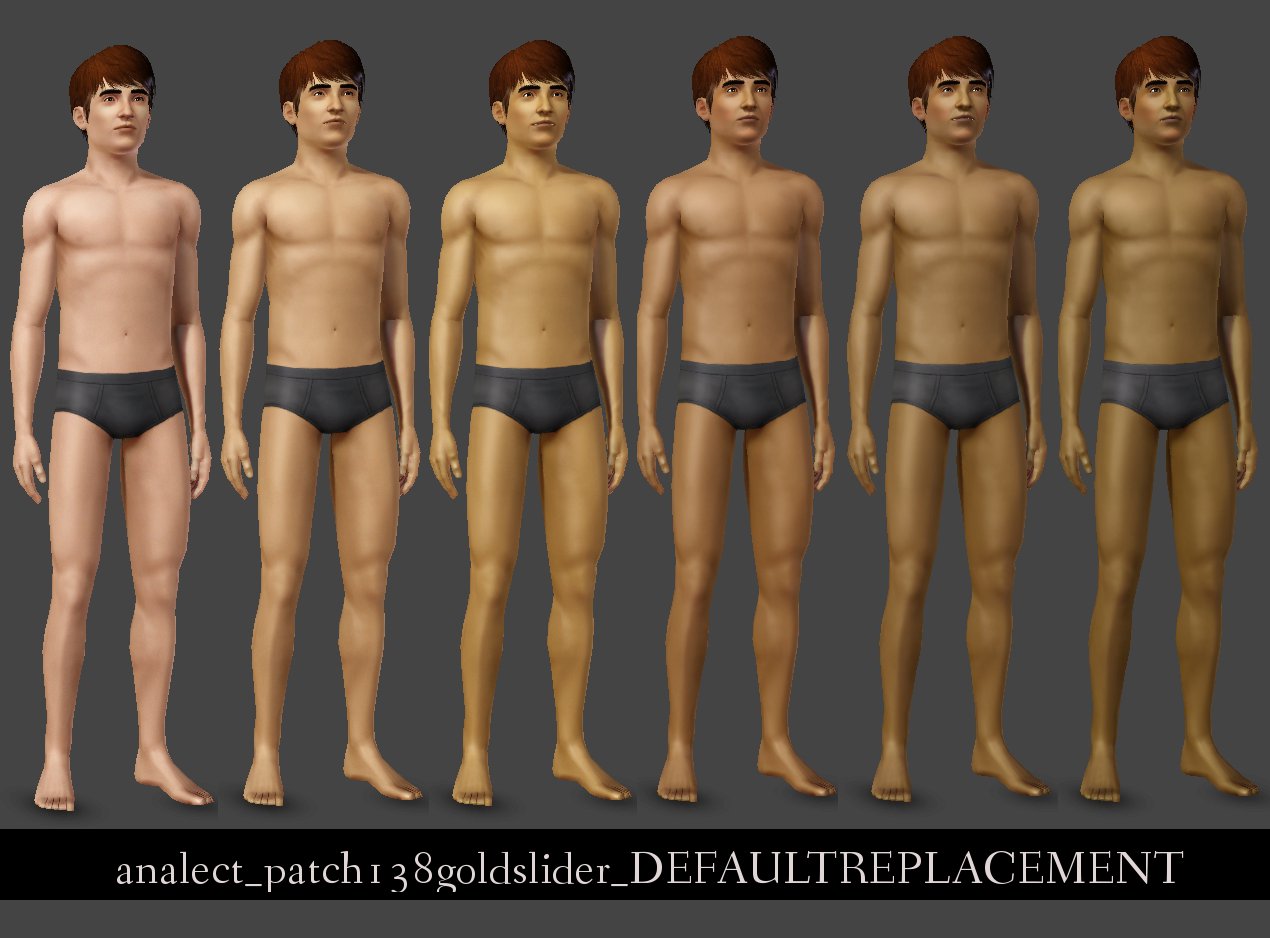
Version 2: Realistic Default Replacements
If you would prefer not to have fantasy skin colours in your game at all, try these more naturalistic replacements. I tried to keep a good mix of tones going - warm, cool, pale, medium, dark, red, brown, yellow etc. - so there's room for a lot of variety in-game. Full previews are in the screenshots. The only caveat is that I really struggled to replace the greyscale/monochrome slider - it seems to give a grey overlay to everything, and I couldn't work out what was controlling that - so that replacement is a rather cool, dark tone.
Full previews of all the skintones are in the screenshots. Again, download all six and pick and choose, or download the combined package.
Compatibility
Built and tested on patch 1.38. If you do not have 1.38, you won't have the skintone sliders, so you won't need these replacements. You do not need the Supernatural EP for these to work.
Also obviously, these are default replacements. You can only have one replacement of each colour slider, though it is possible to make skin tone sliders non-default. I don't have any plans to make non-default versions of these sliders, but you are quite welcome to convert them. There is a great tutorial here about skins, skintone sliders and colour ramps, by missy_harries.
These sliders will not affect anything to do with non-default skins. In fact, let me just make it super-clear that these are just skin tone sliders, not actual skins. You'll notice that I took preview screenshots in CAS using EA's basegame skins, so please ignore the bland and boring textures, and just look at the colours.
Here's an in-game pic with a CC default, showing a range of skintones possible with these sliders:
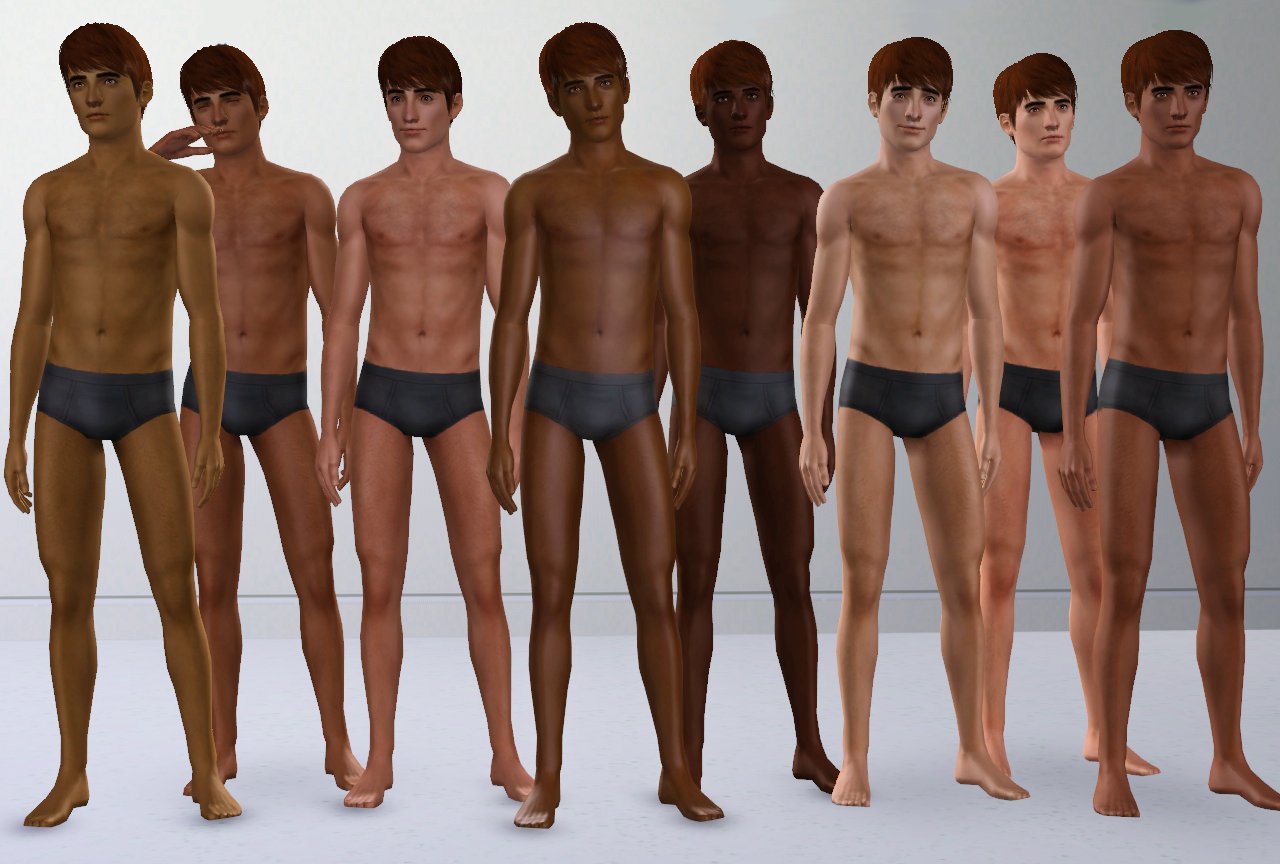
See? No more retina-searing brightness!
The default skin used here is Navatsea's Wild V.2, which is very detailed. You can see how the shading is more pronounced on paler skintones, and looks subtler on darker or warmer colours, which leads me to this point:
How will these look with my current default skins?
I can't answer that for you. To be completely honest, everything from in-game lighting to your graphics card and settings, monitor, and any CC defaults you are currently using will probably affect exactly how these colour ramps look in your game, especially if your preferred default skins have very strong highlights.
However, if you try them out and you're not happy with the results, why not make your own?
Yes. Yours suck. How do I make my own replacement skintone sliders?
It's very easy. If it wasn't, I couldn't do it.
Each skin tone slider is composed of two files: one .dds and one .png. Simply open the .dds file for the skin tone you want to edit in the image editor of your choice and adjust the colours as you see fit. Save it, then save again, choosing “save as” and overwriting the .png file, so you have two versions of the colour ramp, one .dds and one .png. Fire up s3pe, create a new file, then go to Resource > Import and import the .png and .dds files you just edited. Save your package with an appropriate name, then drop it into your mods folder. Done!
I recommend reading missy_harries' All About Skins tutorial, and this thread on the BBS, in which bitterquill/katana_x provides information and some custom ramps (pre-patch 1.38 sliders only) to get you started.
Enjoy!
Additional Credits:
CmarNYC for the Skininator and pointing out to me where the patch 1.38 slider files were hiding... because I am an idiot. XD
Also, missy_harries and bitterquill/katana_x for tutorials and inspiration.
| Filename | Size | Downloads | Date | |||||
|
ALL_138sliders_DESATURATED_DEFAULT.rar
| ALL the desaturated replacements compiled as ONE package. Download if you want to use all the desaturated default replacements in-game.
Size: 9.0 KB · Downloads: 3,345 · 7th Sep 2012 |
9.0 KB | 3,345 | 7th Sep 2012 | |||||
|
patch138sliders_REALISTIC_DEFAULT.rar
| REALISTIC default replacements for the patch 1.38 sliders. Pick and choose which ones you want!
Size: 30.7 KB · Downloads: 2,743 · 7th Sep 2012 |
30.7 KB | 2,743 | 7th Sep 2012 | |||||
|
patch138sliders_DESATURED_DEFAULT.rar
| DESATURATED default replacements for the patch 1.38 sliders. Pick and choose which ones you want!
Size: 10.5 KB · Downloads: 2,073 · 7th Sep 2012 |
10.5 KB | 2,073 | 7th Sep 2012 | |||||
|
ALL_138sliders_REALISTIC_DEFAULT.rar
| ALL the realistic replacements compiled as ONE package. Download if you want to use all the realistic default replacements in-game.
Size: 28.8 KB · Downloads: 8,081 · 7th Sep 2012 |
28.8 KB | 8,081 | 7th Sep 2012 | |||||
| For a detailed look at individual files, see the Information tab. | ||||||||
Key:
- - File was updated after upload was posted
Install Instructions
1. Click the file listed on the Files tab to download the file to your computer.
2. Extract the zip, rar, or 7z file. Now you will have either a .package or a .sims3pack file.
For Package files:
1. Cut and paste the file into your Documents\Electronic Arts\The Sims 3\Mods\Packages folder. If you do not already have this folder, you should read the full guide to Package files first: Sims 3:Installing Package Fileswiki, so you can make sure your game is fully patched and you have the correct Resource.cfg file.
2. Run the game, and find your content where the creator said it would be (build mode, buy mode, Create-a-Sim, etc.).
For Sims3Pack files:
1. Cut and paste it into your Documents\Electronic Arts\The Sims 3\Downloads folder. If you do not have this folder yet, it is recommended that you open the game and then close it again so that this folder will be automatically created. Then you can place the .sims3pack into your Downloads folder.
2. Load the game's Launcher, and click on the Downloads tab. Find the item in the list and tick the box beside it. Then press the Install button below the list.
3. Wait for the installer to load, and it will install the content to the game. You will get a message letting you know when it's done.
4. Run the game, and find your content where the creator said it would be (build mode, buy mode, Create-a-Sim, etc.).
Extracting from RAR, ZIP, or 7z: You will need a special program for this. For Windows, we recommend 7-Zip and for Mac OSX, we recommend Keka. Both are free and safe to use.
Need more help?
If you need more info, see:
- For package files: Sims 3:Installing Package Fileswiki
- For Sims3pack files: Game Help:Installing TS3 Packswiki
#fantasy, #sliders, #skin tone sliders, #skintone sliders, #realism, #realisim, #naturalistic, #natural, #defaults, #default replacement
Stuff 'n' Things
You are free to what you will with my creations, as long as:
- You do not upload them anywhere else and claim them as your own.
- You do not upload them to paysites or sites that are not 100% free.
- The usage policy remains unchanged.
You are welcome to use my stuff in your uploads, or as the basis for your own creations. No need to ask permission, but I would love to see what you do, so feel free to send me a link.
Also, credit is nice, but not required. :D
I don't take requests. Sorry.
More Downloads BETA
Here are some more of my downloads: